

Prepare skinning shed for deer data collection.
Deer season is right around the corner. Collecting information from deer harvested on your property can provide valuable insight to the status of your herd, the progress of your management strategies, and assist in making harvest decisions that will improve the deer herd and ultimately the hunting. Making sure your skinning shed is fully stocked and ready should be an annual pre-season activity. At a minimum, you should be collecting age (jawbone), weight, antler measurements, and reproductive data. Supplies needed include jawbone extraction tool, pruning loppers, wire basket to air-dry/store jawbones, sharp knives, permanent markers, pencils, weight scale, gambrel/rope for hanging deer, flexible measuring tape, instructions on how to collect and store harvest data (recommended if more than one person will be collecting the data), and harvest data sheets to record the information collected. General preparations may include sharpening and lubricating pruning loppers, calibrating weight scales, inspecting and/or replacing rope or cables used to hang deer, ensuring water source is working properly, and stocking/organizing the data collection area. The Quality Deer Management Association (QDMA) or Forestry Suppliers are great places to purchase supplies to collect harvest data including harvest data sheets. Collecting and analyzing harvest data is often the backbone to the success of a deer management program.
Service tractors, ATV’s, and other mechanical tools.
Because early fall is a busy period for equipment use such as tractors, ATV’s, and chainsaws, now is a great time to perform routine maintenance or service. I recommend developing a maintenance sheet that includes all your equipment and keeping records of service. This will ensure that equipment is taken care of and will be in good working order for the fall activities such as food plot planting and preparing your property for hunting season. Don’t forget about tractor implements such as grain drills, mowers, or harrows. We even keep a maintenance sheet for small tools like weedeaters and pressure washers. I have learned that preventative maintenance (maintenance done before something breaks) saves lots of time and money.
Check, repair and prepare deer stands for hunting season.
While the best time of year to relocate or place new deer stands on your property is in late winter after the deer season has ended or very early spring (before green up), late summer or early fall is when you need to revisit these stands to tighten them back up, inspect for loose nuts/bolts, rotten or loose wood, or any other safety hazards. This is also a good time to check the shooting rails, padding, replace pull up ropes, and trim shooting lanes where needed in preparation for hunting season. However, do not over do the shooting lanes. Small openings are all that is normally needed to identify and shoot deer. Because we have so many deer stands on the property I hunt, we have started using flagging as a way of ensuring each stand is safe. That is, once a stand is checked, tightened, etc., we simply tie a piece of colored flagging on the base of the stand or the ladder. We use a different color each year. For example, this year we are using yellow flagging. So, if you get to a stand this fall that does not have a piece of yellow flagging on it, you know that it has not been through “final inspection” this year and to use caution if you use it.
Mow under and around fruit trees and orchards.
Mowing around fruit trees will not only enhance the growth of the trees by reducing competition for resources by surrounding plants, but will enhance the aesthetics of your property. Mowing will also help “clean” the understory around the fruit trees so wildlife can find the fruit as it drops in the fall (acorns, persimmons, apples, etc.). As fruit or nuts begin to fall, these areas provide great places to hang a trail camera to get pictures of wildlife using the trees and/or a great place to hang a deer stand!
Develop a pre-season deer harvest plan that will maintain or improve your deer management program.
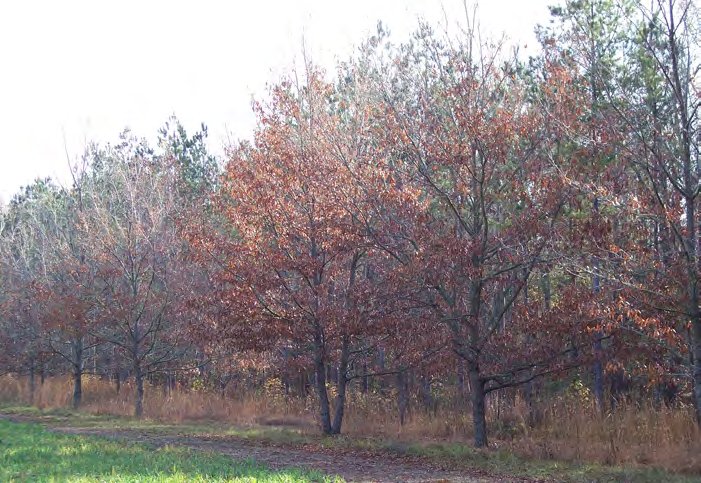
Monitoring the status of your deer herd is the backbone to the success of your deer program. Hopefully, you have been collecting harvest data (weights, measurements, ages, etc.), hunter observation data, as well as conducting camera surveys. Collectively, this information is used to make educated deer management decisions that will help you achieve the goals of your program. Without this information, you are simply guessing and/or hoping the hunting on your property will get better. Though it may not be the most exciting part of deer hunting (but neither is cleaning out and repairing shooting houses), collecting and analyzing information about your deer herd will result in better management decisions and ultimately better hunting. If you haven’t already done so, ask a wildlife biologist to review your data or information and provide harvest recommendations before hunting season starts. Using your data and trail camera photos, an experienced deer biologist/manager can provide valuable insight to the status of your deer herd. For most deer biologists, assessing deer management programs and hunting is more than a hobby or passion – it’s their profession. It’s what they do day in and day out. Based on their experience and your information, a deer biologist can often prescribe recommendations that will significantly improve the hunting on your property.
Begin flooding duck ponds in early September.
Teal are usually the first ducks coming down the flyways as they migrate south for winter. Although it depends on where your property is located, you should expect to start seeing teal in late August through mid-September. To accommodate these waterfowl and/or to attract them for the early teal hunting season, flood at least 30% of your duck pond. To be most attractive, make sure there are some open water areas within the flooded area. The main reason for not flooding the entire duck pond is to delay seed deterioration caused by flooding. Seed deterioration rates, or the amount of time it takes for a seed to break down after being flooded, vary among different plant species. Most native wetland plant seeds are well adapted to flooded conditions and will last up to 3 months under water. However, most agriculture crop seeds breakdown much quicker. Thus, you only want to flood enough of your pond to provide early arriving teal with a food resource. Begin flooding the remainder of the pond in late October for the main flight of ducks. This will ensure the seeds you’ve worked hard to produce will remain longer into the winter to provide food and attract ducks. If you have never shot early season teal, you’re missing out. Teal respond to calling and work decoys well and they fly in fast, tight flocks which makes for some fast and furious shooting.
If you added annual clovers to your food plots last fall, September is the time to apply management to regenerate the food plots.
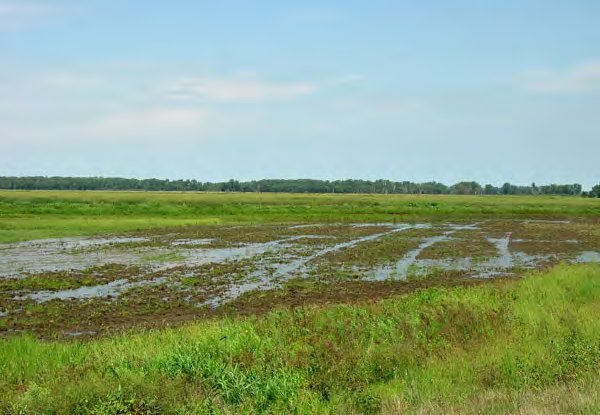
Incorporating reseeding annual clovers into your fall plantings will allow you to extend the plot’s wildlife value by providing quality food sources through early summer. Without them, fall plots of small grain such as winter wheat and oats generally become less productive and thus less valuable for wildlife by early spring. If you have planted annual clovers such as crimson or arrowleaf clover, allow them to flower and seed out – which normally occurs in April – June depending on which growing zone you are in. The flowers are important for game birds, particularly quail and turkey poults. Flowers attract insects which are an important component in the diet (source of much needed protein) for very young turkeys that were hatched this spring. Although plots generally get weedy after the clover has seeded out (which isn’t always a bad thing), leave these plots alone until early fall. About 3 weeks to a month prior to planting time, mow the plots as low as possible, allow a week or so for the weeds to start growing again, and apply glyphosate (RoundUp) to knock them out and prep the plot for re-planting. If weeds were thick, you may consider burning the thatch off to expose bare ground (burning also enhances clover seed germination). Once the weeds die (or have been burned off), spread fertilizer, lightly disk the plot to expose bare ground and “stir up” the residual clover seed from last year, then plant annual small grains (wheat and oats). The key to the whole process is to not disk the food plot too deep. After the first planting, and if you’ve allowed last year’s clover to seed out, annual clovers will reseed and come back every year – which not only provides great nutrition and extends the life of your fall annual plots, but will save you money on seed.
Implement habitat enhancement plans.
Summer is a good time to implement habitat enhancement projects such as timber harvests, timber stand improvements via hack & squirt methods, Quality Vegetation Management (QVM) to stimulate desirable wildlife understory species via herbicide applications, roadside enhancement areas, and creating new food plots. All of these projects or activities will add wildlife value to your property. Although it has already gotten late in the growing season, I like to have these projects planned well ahead of time so that they can be implemented early in the growing season. This allows a longer time during the growing season for these areas to “recover”. Timber harvests or dozer work that is done late in the growing season often results in poorer quality wildlife habitat during the first year because plants have not had time to re-colonize. Additionally, these areas are not as aesthetically pleasing during the following winter. However, if you are running behind, I recommend getting these improvements in when you can. I’d rather get the improvements implemented late than to not have them done at all.
You can think of it this way – you will be early for next year!
Prepare fields for dove season.
The only thing that helps get me through August is knowing that dove and football season will be starting soon! With much experience planting and managing dove fields, the most successful dove fields have a few things in common. First, they have an abundance of food (seeds). Dove are primarily seed eaters and consume very little insect matter or green forage. Among the various seeds available to dove, grass seeds and grains comprise most of their diets. Secondly, the seeds must be readily available to the dove. Dove prefer to feed on the ground in open cover where they can watch for approaching predators. Dove have short legs and are not strong scratchers (like turkeys) so they avoid areas with dense ground cover and rough vegetation. Finally, the field must be located in an area used by dove – similar to being in a flyway for waterfowl.
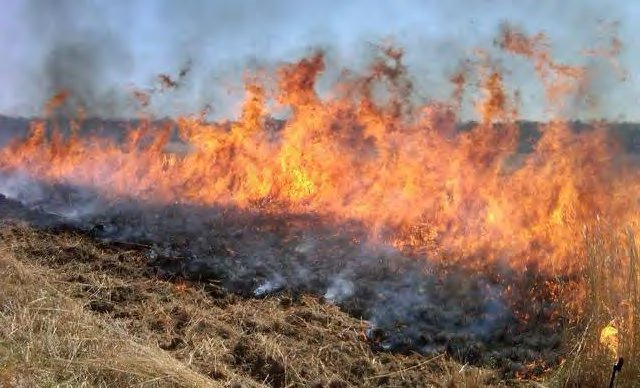
Although it can be done, August is a little late to begin thinking about planting a dove field unless you are preparing for the last phase of the season. However, the most commonly planted crops for attracting dove include various millets, sunflowers, wheat, sorghums and other small grains. Assuming you have a good crop growing that will mature as the season approaches, let’s discuss a few ways to ensure that the seed you worked so hard to produce is readily available and will attract the most dove possible. First, let me caution you to check local baiting laws. Most states allow manipulations of crops so that seeds that were grown on that particular field are available to dove. Here are a few strategies I use when possible. First, always keep disked strips of bare ground through the field. As mentioned, dove like clean/bare ground to land in and easily walk around. They also use these strips to pick up grit (small pebbles and sand) used in their digestive system. Freshen these strips up through the growing season as needed. A week or so before the season, I burn sections of the field to remove vegetative cover of the crop and expose the seed on bare ground. If crops are mature but still green, apply an application of glyphosate (Round Up) a week or so before burning to brown the crop ensuring it will burn clean. I often use the bare dirt disked strips as firebreaks – so think these through before installing them earlier in the process. Plan how much of the field to burn according to your anticipated hunting schedule. For example, if you plan to have one “blow out” hunt when the season opens, prepare and burn the entire field (or whatever is needed). However, if you plan to hunt through the various phases of the season, save some of the field to burn later just before hunts are scheduled.
A few other tips:
- Top-sowing or broadcasting without covering the seed is not considered a normal agricultural practice and is illegal in most states.
- Dove prefer to land in clear areas. Maintaining disked bare ground strips will ensure easy access for dove.
- Plant dove field with a variety of plantings that will have varying maturation dates (e.g. browntop millet, Japanese millet, and sunflowers). This will ensure continued attraction throughout the season.
- Too much shooting pressure will cause dove to move to other areas. Limit shooting to one hunt per week.
- Manipulating portions of the field by mowing, chopping, burning, or disking a week or so prior to hunting will help expose seeds to attract dove to the field.
Install trail cameras to capture photos of deer.
Depending on where your property lays in the whitetail’s range, antler hardening (shedding of velvet) has already taken place or will shortly. Late August or early September is a great time to begin installing trail cameras around your property to capture photos of bucks. During this period, bucks are congregated in loose bachelor groups allowing you to photograph multiple bucks together. Where to place the cameras depends on local food sources and deer activity. In some cases, attracting deer to a camera site with scattered whole corn is most effective. However, mineral licks that were created earlier in the year often make great camera locations, particularly if you have experienced wet conditions. Other locations that may be effective in late summer or early fall include entrance trails to large agriculture fields, along the edge of smaller food plots of perennial crops, summer food plots, or small water holes (if weather is warm and conditions are dry). Naturally, most hunters are anxious and excited to plug the SD card into a computer and run through the photos to see what kind of bucks they have, which is what I do. However, take time afterwards to do a little analysis of the photos. By counting the number of bucks and does in the photographs you can get an idea of the existing adult sex ratio which will help you make harvest decisions. Estimating the age of the bucks you photographed will shed light on the buck age structure. Obviously, a full-scale camera survey will provide the most accurate and comprehensive information about the deer herd, but “random” trail camera photos certainly have a story to tell and can help you better understand the status of the deer herd on your property. All of this allows you to make better management decisions that lead to desired results. Photos from trail cameras will also help reduce “mistakes” when judging bucks in the woods while hunting. This is particularly true for guest hunters that may not be as familiar with the deer herd as you are.
