

Make final equipment preparations for duck season.
By early November, flooding strategies on managed duck ponds should be well underway. Teal are generally the first to arrive in September followed by the fall migration of other waterfowl in October and November. In most areas the general duck season opens in November. Outside of managing the water levels and ponds themselves, now is a good time to make final preparations of things related to the hunt itself. There is nothing worse than looking forward to the first duck hunt and before daylight of opening morning realizing that your waders have dry rotted or that your duck blind is full of fire ants! Make preparations now to ensure you are ready to have a fun and successful hunt. While everyone’s situation is different, a few items I recommend checking include waders or rubber boots, boats (lots of things to check here), paddles or push poles, lights, decoys and rigging, obstacles along paths to and from duck hunting blinds, the blinds themselves, platforms for dogs, and shotguns…to name a few. I say all these things from experience!
Prune and clear hunter access trial to deer stands
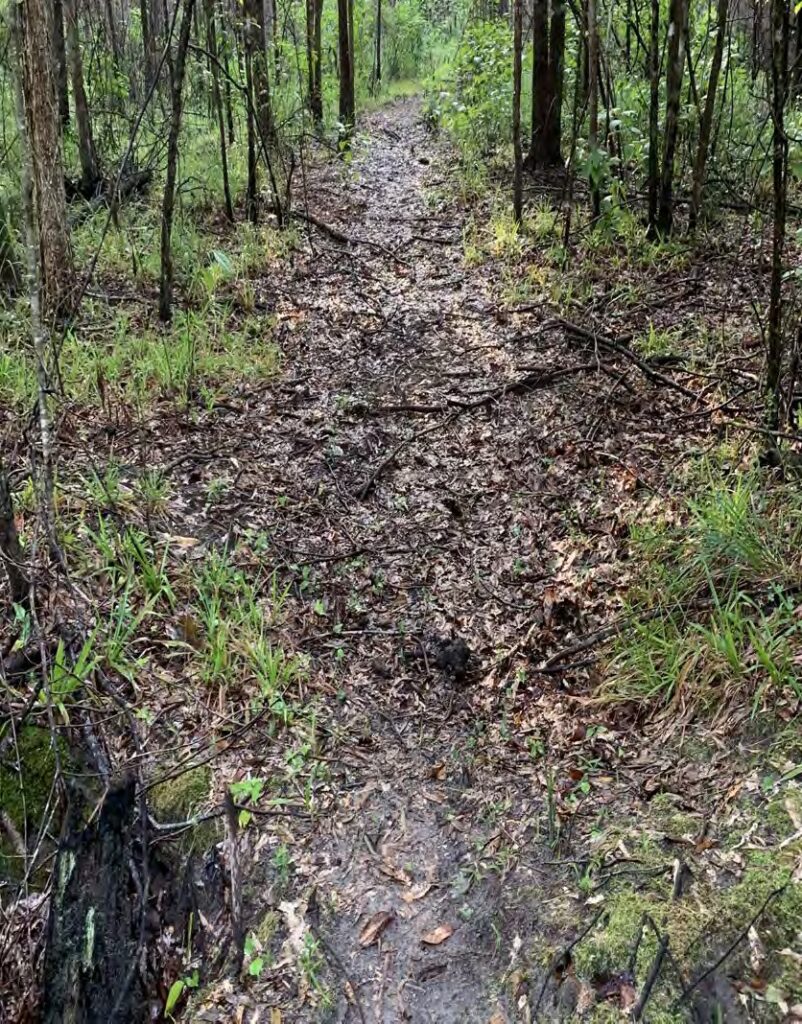
Hunters that consistently experience successful hunts “micromanage” how they navigate a property and their access trails. That is, these trails are pruned and established during the initial set up (which often takes place right after hunting season), but as the season approaches, they take time to prune and completely clear the path of all debris including leaves. The goal of clearing the path is to remove vegetation that may rub against a hunter walking in or out on the trail (scent management) and provide a silent walking path. Clearing the trail is done with a leaf rake or even a leaf blower. The result is often a bare dirt trail that allows hunters to silently sneak to and from stands. Clearing access trails, particularly to food plot stands, is something that needs to be done periodically throughout the season. When providing hunting guidance to clients I often describe it this way – if there were 8 deer already on the food plot when you arrived, you should be able to sneak in and slip into the stand undetected. If you can do this, you will apply significantly less disturbance (particularly when leaving a stand at dark with a field full of deer) and will have better hunts throughout the season.
Build and install excluder cages on your food plots.
Excluder cages are simply small fenced structures that are placed on food plots to “exclude” or prevent deer from accessing food plot crops inside the excluder cage. Doing so allows you to observe or monitor deer use of the plot and food plot success. Excluder cages do not need to be big, just enough to prevent deer from eating a small area of the food plot. In general, excluder cages are nothing more than a short length of 4-foot hog-wire fence that is “rolled” and fastened with either wire or zip-ties to create a tube with a 2-3′ diameter opening. The excluder cage can then be placed on a food plot and anchored down with a T-post or a couple pieces of rebar. Excluder cages are particularly helpful if you have a high deer density. I’ve often seen food plots in areas with a high deer density appear as though the plants never germinated. The landowner or land manager is beating himself up because he is thinking that he did not plant the food plot correctly, or that the particular seed mix he planted isn’t growing well on his property. When in reality, deer had literally eaten the plot to the ground before it had a chance to grow (in this case, I would consider installing more food plots or, depending on your goals, or planting lead to reduce the herd!). I religiously use excluder cages because they help assess plot success and provide insight when seemingly crop failure occurs.

Calibrate deer scales before hunting season.
Whether the scales you use to weigh harvested deer at your hunting property are 10 years old or right out of the box, they should be calibrated each year before hunting season to ensure accurate weight data is collected. To calibrate scales, simply hang an object of known weight from the scale (e.g., 25 lbs. dumbbell, tractor weight, etc.), along with your gambrel (normally a triangular metal hanger used to attach deer to scale), then adjust the scale to the known weight if needed. Although there are many makes/models of scales available most have a calibration screw that can be easily adjusted. Also note that it is not uncommon for a calibrated scale to read something other than “zero” when idle. Recording accurate weights from harvested deer provide insight to the health of deer on your property and will assist in making management decisions (herd and habitat) to achieve overall goals.

Utilize standing corn to enhance deer hunting experiences.
Although I never recommend planting corn for feeding deer (except in the North), it can provide great “cover” value for deer in the winter and creating exceptional hunting opportunities. Regarding planting corn for feeding deer in the Southeast, it’s simply not worth the farming time and effort when you can get more for your money out of a 50-pound bag of whole corn from the feed store (or even Walmart now days!). However, planting corn to create exceptional hunting set ups is a different story. If you have corn planted on your property, particularly larger agricultural fields, strategically leave some standing for deer. Standing dead corn is not only attractive to deer from a food standpoint but the cover it creates provides great travel corridors to connect woodlots or mature timber. In some situations, deer will “funnel” through mature woods to enter the standing corn as their travel path. This can make for some fun hunting in the mature woods near the corn. Mowing a wagon wheel pattern or hub & spoke design in the corn also makes for great hunting. This strategy is nothing more than mowing 8-10 ft strips through the corn as spokes that radiate out away from the hunting stand (hub). Depending on the skill level of hunters using the property, particularly guests that may hunt the spot, I often only mow spokes out to 125 yards from the stand. However, if the situation allows and hunters are skilled, spokes can be mowed out to 300 yards. The resulting spokes can either be left as is to simply provide shooting lanes through the standing corn or planted in fall food plot crops – or a combo of these. This set up is particularly successful during the rut and/or on cold mornings. Standing dead corn also provides great winter habitat for quail and turkeys. Leaving a border of standing corn around a field provides valuable wildlife habitat and creates a soft edge along abrupt woodlines.

Record and utilize deer hunting observations.
Quality deer management involves more than producing quality bucks. It should create quality hunting experiences as well. Collecting hunter observation data (where hunters record the number of deer and quality of deer they see while hunting) allows you to monitor the hunting quality of the property. Adjustments in management and/or hunting strategies can be implemented accordingly to promote better quality hunting if needed. Additionally, hunter observation data is a great (and cheap) method to help assess some parameters of the deer herd. Although a camera census is, by far, the most accurate way to collect information regarding the deer herd, trends in population parameters such as the adult sex ratio, buck age structure, and fawn recruitment can be monitored through hunter observation data. However, for this data to be meaningful, it must be collected accurately each year to track trends in the data. Hunter observation data is also a good way to assess hunting strategy success. When recording this information, hunters generally record when and where they were hunting (e.g., PM-food plot, AM-woods, AM-clear cut, etc.) and what they saw. When the data is analyzed, it provides insight as to which hunting methods and which areas are most productive for the property. For example, through hunter observation data collected throughout the season, you may find that hunters saw more mature bucks per hunt in thinned pine stands in the morning verses the afternoon. Thus, you can adjust your hunting strategies to enhance the productivity of your hunting time.
Keep notes from deer hunting experiences
One thing I’ve learned working with landowners/hunters across the country is that the consistently successful deer hunters keep good notes and apply what they have observed to enhance future hunting experiences. Whether they keep a personal journal of hunting observations or formally fill out hunter observation cards, they have records to reflect on and analyze after the season to help make adjustments to hunting strategies and stand management. That is, observations made this season help these hunters prepare for a successful season next year. Keeping notes is particularly useful on properties with multiple hunters where some of the seemingly less important information may not be shared around the fire at night, but when combined with other observations at the end of the season may provide great insights for adjusting a setup for more successful hunts. An example of a seemingly unimportant observation may be “bumped 3 deer in oaks on the way in”. If this was observed by only one hunter on one hunt, it may not be meaningful. However, if “bumping deer” was noted on 6 hunts to this stand it deems further investigation. Should the access trail to this stand be moved to avoid bumping deer? Deer are there for a reason. Do we need a stand in the area we keep bumping deer? Another example may be that at a particular ladder stand many mature bucks were seen, but most bucks seemed to skirt the edge of a slough that was 150 yards to the west. Rather than writing this off as bad luck, this stand would be moved closer to the action with careful consideration of hunter access, winds required to hunt it, etc. Moving this stand may happen during the season or during post-season efforts depending on the situation. Although deer movement varies, numerous hunter observations on a stand without much action calls for removing and relocating that stand.
Implement timber stand improvements – kill undesirable tree species
Removing undesirable trees is an effective habitat management strategy to enhance wildlife and/or timber value. Killing undesirable trees is commonly used to remove non-native invasive species or to “release” desirable tree species like oaks (often referred to as timber stand improvement or TSI). Removing undesirable trees reduces competition for resources such as sunlight, nutrients, and water resulting in better health and growth of remaining desirable trees. In some cases, removing undesirable trees stimulates natural understory vegetation growth providing quality food and cover for wildlife. One of the simplest and most effective techniques for removing select trees without cutting them down is called the “hack-and-squirt” method. Implementing the hack-and-squirt method is as simple as it sounds. Simply hack small cuts in the trunk of target trees and squirt an herbicide solution into the cut. One advantage of this method is that you can target trees you want to remove and leave those you want to promote or encourage. Using a sharp machete, brush axe or hatchet, chop into the trunk being sure to penetrate the cambium layer below the bark. With the blade still in the cut, twist the blade downward to open the cut and spray herbicide into the cut. The cut should form a “cup” that will hold the herbicide. If the cut is too shallow, herbicide will leak out reducing the effectiveness of the application. A common plastic utility spray bottle works well and generally delivers 1 milliliter of herbicide mixture per trigger pull. The number of cuts made in the tree will vary depending on the herbicide used and size of the tree. Although there are several effective herbicides available, I normally use Arsenal AC (imazapyr) because it controls a wide range of species. Arsenal AC’s label recommends one cut per 3 to 4 inches of tree diameter at breast height (DBH). The mixing rate for Arsenal AC is 10 percent, or one part herbicide to nine parts water. Regardless of which herbicide you choose, always read the label for appropriate dosages, cut spacing, and mixing instructions. For example, Arsenol is soil active which means you would not want to apply it if there is a desirable oak tree adjacent to the tree you are treating. Also be sure to wear appropriate clothing and protective equipment as recommended by the label. It may be worth noting that the “hack & squirt” method is effective almost any season except early spring when trees are experiencing heavy sap flow/sap rise. However, I typically schedule hack & squirt treatments during late summer and before leaf drop of fall.
Mow and fertilize perennial clover food plots.
While preparing fall annual food plots, do not neglect perennial plots that you have managed through the summer. Early fall is a good time to give them their final mowing and a boost of fertilizer. With cooler temperatures and fall rains, clover will start recovering from the stress associated with heat of summer. Do NOT mow the clover too low. Just above the clover plants is good (clipping the flowers and other weeds). If you will be tackling this project after mowing roads, pond dams, and other areas on your property, be sure to clean weed seeds and thatch from your mower deck before mowing any food plots. Unwanted weed seeds have a sneaky way of collecting on mower decks then jumping off onto your well managed fertile food plots. Cleaning a mower deck off is easy to do with a handheld blower. While a blower is more effective, keeping a small broom on your tractor is better than nothing. Taking 2 minutes to clear weed seeds from a mower deck is much easier than fighting the weed once it gets established in your food plots. Also, do not use a fertilizer with nitrogen. Clover is a nitrogen fixer meaning it makes its own nitrogen. Adding nitrogen will only feed undesirable weeds; particularly grasses. As a rule, 200 lbs. of 0-20-20 per acre is a typical application if soil tests are not available. However, it is always best to test the soil fertility and apply recommended rates. If lime is needed, apply this as well.
