
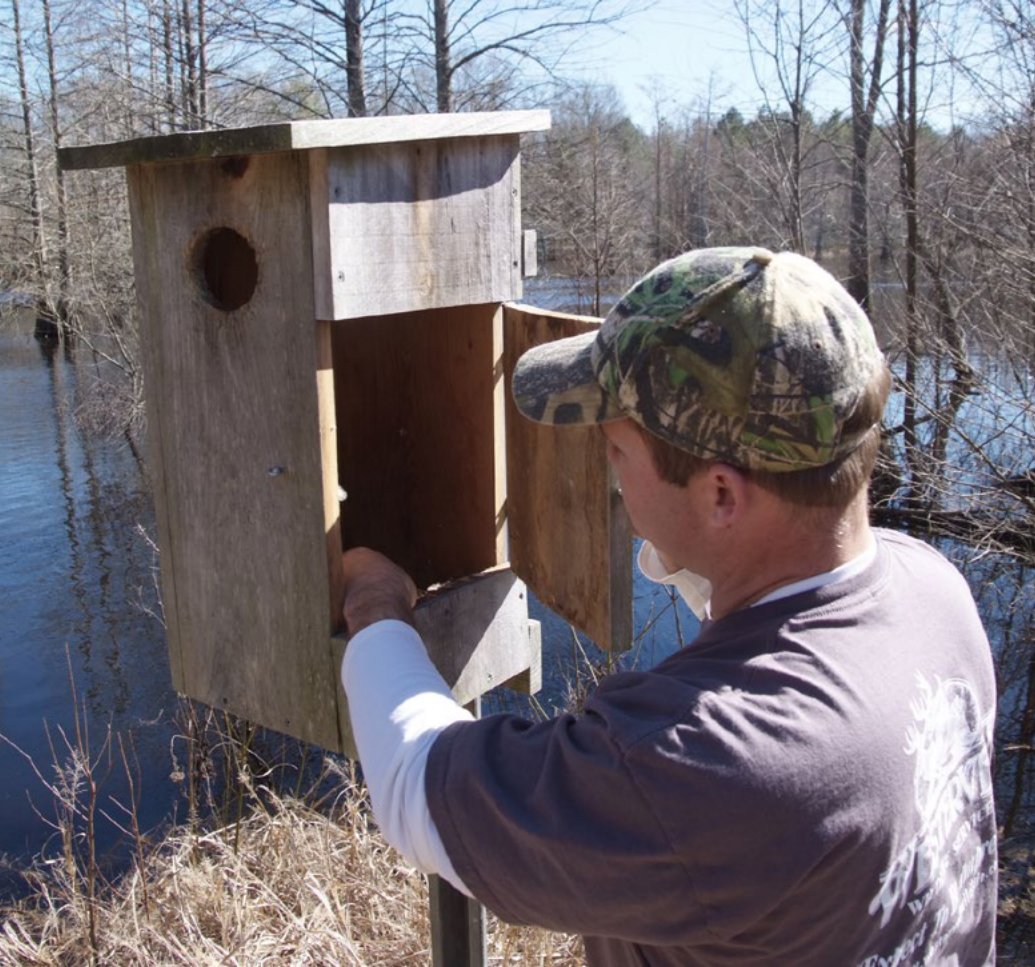
Erect new wood duck boxes and/or clean out existing boxes in preparation for the nesting season
The first step in preparing existing duck boxes for this nesting season is to clean all the old nesting debris out. A good nest box design allows an easy way to clean the old nesting debris out. Common designs may include a drop floor or a side door where debris can be pulled out. Once clean, place 4″-6″ of sawdust or wood shavings in the bottom of the box for nesting material. I prefer shavings verses sawdust because they do not absorb moisture as easily which causes rotting and mold – check with a wood shop that uses a planer for shavings. Cedar chips that are used for dog bedding can be good nesting material as well and can be purchased at pet stores. Erect new boxes before February in highly visible areas near good brood rearing habitat. Adequate protective cover is essential for brood survival. Brood habitat should include a dependable source of water with plenty of shrubs and emergent vegetation for food and cover. These areas are generally along the perimeter of a pond or swamp. Wood duck boxes should be cleaned out and inspected at least once per year. Word of caution – always be careful when opening wood duck nest boxes. Many other animals use the boxes. Animals that are commonly found in wood duck boxes include gray squirrel, flying squirrel, rat snakes, screech owls, and flycatchers. Building wood duck boxes, putting them out, and checking them after nesting season to monitor use is always an adventure and gratifying. This is also a great project to include children. Managing wood duck boxes provides lots of hands on work and makes them feel good about helping animals…plus it teaches them good stewardship.
Obtain an updated aerial photograph of your property
Updated aerial photographs are an invaluable tool in land/wildlife management. In fact, it is the first thing I want to see when someone asks me to help improve their property for wildlife or create a management plan. I prefer aerial photographs taken during the dormant season when deciduous trees have lost their leaves (i.e., late winter or early spring before green up). This allows you to distinctly see differences in pine or evergreen habitats and hardwoods. Infrared images taken during the growing season can do this as well, but I prefer color photos taken during winter. An aerial photo puts everything into perspective by allowing you to see the various habitats and how they lay across a property. While this may sound odd, it also allows you to see habitat diversity and layout of your neighbor’s land which may play a role in how you manage your property. For example, if your goal was to manage for turkeys and you see on an aerial that your neighbor’s property is primarily mature timber, increasing nesting habitat on your property will attract nesting hens (and gobblers) from the surrounding property in the spring (not that you want to “steal” turkeys from your neighbor. Ha!). Also, aerial photographs often become my “drawing board” when devising plans to improve a property. That is, having a map of the entire property in front of me, I can see everything, where various habitats are on the property, where food plots are located, etc. Having this, I can visualize how hunters, deer or other wildlife use the property and/or how we can improve the property to not only ensure quality habitat is provided across the landscape, but where habitat management can be used to direct wildlife to areas for improved hunting. There are many companies that specialize in taking aerial photographs, adding geographic features (roads, property lines, habitats, etc.), and providing a custom aerial map to the customer’s specifications. While using these companies is obviously more expensive than pulling your property up on something like Google Earth, the resulting map/photo will be of high quality, up-to-date, customized to your liking, and can be uploaded into GIS type programs that allow you to pull useful information about your property (e.g., number of acres of each habitat type) and create detailed habitat management plans. While I prefer professionally flown custom maps to work with, I must admit I use free online satellite imagery (e.g., Google Earth Pro, Bing Maps, etc. more often than in the past. They are simply fast and easy to use. The downside of these images is that they are often outdated, particularly if you are actively managing habitats.
Initiate Late Winter/early Spring Strip Disking
Are you looking for an inexpensive management strategy that can significantly improve the wildlife value of your property? Strip disking is an excellent management practice that can produce exceptional food and cover for various wildlife. If you have a tractor and a disk, the only expenses of strip disking are fuel and time. Simply find areas within relatively open habitat, drop the disks, and drag them. Obviously, the tractor operator needs to pay attention to avoid stumps or other obstacles to prevent damaging the tractor or disks. The goal is to just “stir” the soil to promote germination of seeds in the natural seed bank. Generally speaking, one pass is all that is needed. Disking can be done along roadsides, in or around old fields, and within thinned pine plantations or mature longleaf stands. Disking strips 10-30 feet wide in late winter and early spring will stimulate the growth of desirable native quail food plants such as partridge pea and beggarweed. The new succulent vegetation that grows in the strips will also attract insects. Late winter – early spring is also the best time to disk to promote high quality deer browse as it promotes broadleaf weed growth. These areas can be managed by re-disking every other year. The time of year you disk will influence the types of plants that colonize. For example, winter disking produces heavy-seeded quail foods such as partridge pea and ragweed, while disking in April increases the production of important seed-producing grasses such as panic grass. Disking in June favors grasses and green vegetation that attracts insects and a number of major seed plants that turkeys and quail readily feed upon in the fall. In general, seasonal disking can provide a diversity of seed producing plants for quail and turkeys as well as quality browse plants for deer.
Mow early or wait until early summer
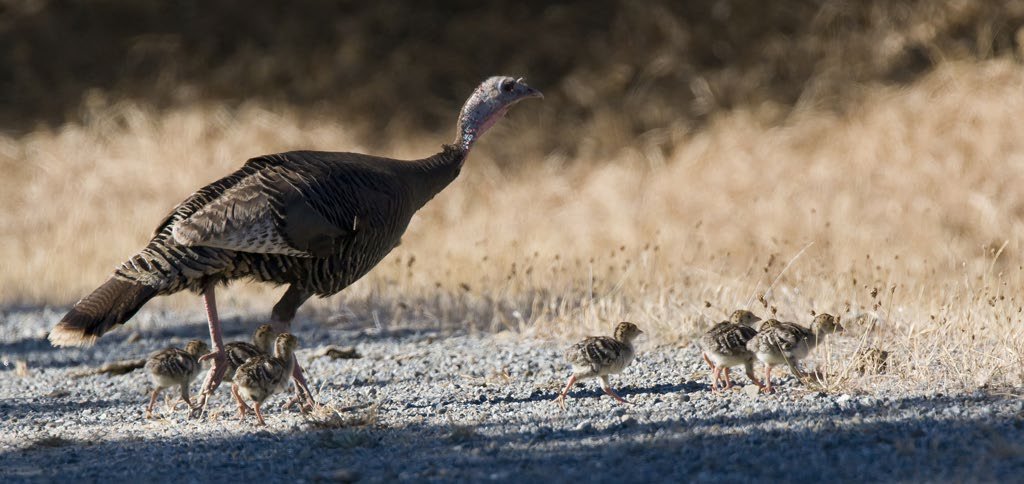
If you have areas that need to be mowed, mow them before turkey nesting season (which is generally March-May in most of the Southeast) to prevent destroying nests. Unless necessary, I recommend leaving as much of roadsides, fields, and other openings un-mowed to provide additional nesting habitat for turkeys and other birds. Much turkey nesting research shows that these areas are valuable and heavily used for nesting by hen turkeys. Even if turkeys do not use all of the un-mowed areas, these areas will host an alternate food source (small mammals – rats, mice, and rabbits) for potential turkey nest predators. Having this “extra habitat” also increases the “search area” and reduces predator success in finding turkeys and their nests giving turkeys a better chance of producing a clutch and surviving. This strategy is more valuable for landowners whose property has limited nesting habitat.
Plant shrubs to screen unnatural structures or objects
While this has nothing to do with wildlife management, it may enhance experiences around the property you hunt. Late winter is a great time to install or transplant shrubs or other plants to hide unnatural objects around your camp or property. Examples of such items may include electric boxes, AC units, pump houses, clay target throwers, etc. While purchasing shrubs or plants is always an option, consider transplanting natural plants that exist on your property. These plants are well adapted for the soils and climate of your property and best of all they are free. Choose shrubs/plants that are evergreen or will provide the “cover” needed to do the job. A few plants I have had great success with include wax myrtle, broomsedge grass, and various holly and ferns. When digging up plants keep as much of the root ball intact as possible. That is, leave plenty of room around the base of the plant and cut a circle around the plant with a shovel working deeper and under the plant until the root mass (full of dirt) breaks free. Handle the root mass with care while transporting to its new home. The goal is to keep as much of the existing soil around the roots in place as possible – which protects small feeder roots of the plant. A large plant container (black pot that shrubs or trees are grown in) is useful to have when transporting to protect the root ball. Dig the new hole larger than the original and loosen soil in and around the hole. After placing the plant in its new home, use soil from the hole to pack around the root ball. Ensure no air pockets exist and firmly pack the soil (firm not compact) around the plant. If possible, water the plant in. During its first year of life (particularly the first summer), the shrub may need a little TLC. Make sure it has plenty of water and keep competing vegetation under control. Depending on the situation, native shrubs can provide great screening along property lines where needed.
Calculate acreage of food plots
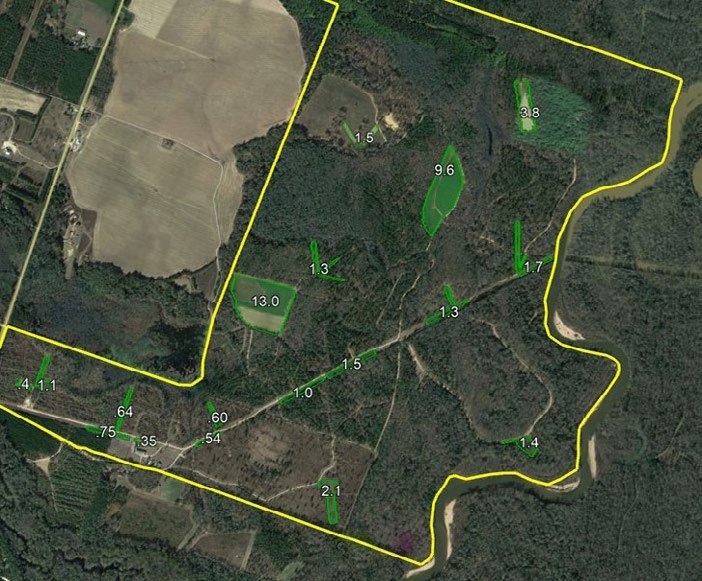
Late winter can be a down time for many landowners. Most deer seasons are close to being over and many hunters are already thinking about what can be done to improve their property and hunting for next season. In the world of food plots, knowing the size of your fields can be critical to growing successful crops. Technology has come a long ways since I was a young biologist. One of the easiest ways to determine acreages of areas such as food plots, timber stands, or lakes is by using Google Earth Pro. I have found this free software program very user friendly and accurate. If you are not familiar with it, simply search the internet and download it. The program is relatively easy to learn/navigate but has help/tutorials if needed. If you are more “old school” and need to “put your hands on it” there are several other ways to measure and determine acreage. A few of these include using a handheld GPS and simply make a lap around the plot, using a range finder to shoot/determine lengths of plot perimeters, or simply using the old tried and true pacing method. The ability to pace off a distance with reasonable accuracy is useful for many applications when managing a property. In fact, I still use the pacing method for many applications, particularly when roughing in new food plots. To determine the length of your pace follow the steps below. Once you know the length of your pace, simply measure the length and width of a food plot to determine its acreage.
Determining the length of your pace:
- Starting with one foot, count a pace every time the opposite foot is put down. With a measuring tape or length of rope, mark off 100 feet along a dirt road or on a food plot.
- Using a normal, comfortable stride, pace the 100 feet about 4 times, noting each time the number of paces it takes to cover the distance. (Note: For the best accuracy, it is important to walk at a normal pace rather than exaggerated steps.)
- Divide the sum of the total number of paces by the number of times you paced the distance. This figure represents the average number of paces it took to walk the 100 feet.
- The length of your pace will be equal to 100 feet divided by the average number of paces it took to travel the 100 feet (calculated in step 3).
An example of stepping off measurements to calculate the acreage of a food plot:
A person with an average pace of 5.6 feet found that a rectangular food plot measured 64 paces by 97 paces. What is the acreage of the food plot?
- First convert paces to feet: 64 paces x 5.6 = 358.4 ft., and 97 paces x 5.6 = 543.2 ft.
- Next calculate the area of the food plot in square feet: area of a rectangle = length x width, so area = 358.4 ft x 543.2 ft. = 194,682.9 sq. ft.
- Then divide the area of the compartment by the number of square feet in an acre (43,560 ft.): thus 194,682.9 sq. ft. divided by 43,560 sq. ft. = 4.5 acres.
Knowing the exact size of a food plot is extremely useful when it comes to figuring up proper amounts of lime, fertilizer, and seed. Over-applying any of these is not only a waste of money, but can negatively impact your crop performance. Many times, seed is put down too heavy on food plots because actual size of the area being planted was not known. “More is better” does not apply to food plot planting. Crops need to be planted at or close to the recommended rate. Too many seeds per square foot results in a poor stand when plants begin competing for moisture and nutrients. Take a day this winter to make a lap around your plots and get an accurate reading of the areas you plant, it will pay off.
Now is the time to scout for new deer stand locations
How many times have you heard (or said to yourself) “Those dang deer know when deer season starts – we’ve been seeing them all summer and now they have gone into lock down”? Deer do not know deer season on their calendar. Hunters are their alarm clock. It happens every year and we have all been guilty of it. The woods have been quiet with no humans walking around, no ATV’s, no chainsaws, no trucks or tractors, no loud noises and then a month (or week) before the season the woods are inundated with LOTS of these unnatural disturbances – Hunters busting through the woods doing lots of things associated with preparations for hunting season. This is the alarm clock that triggers deer to alter movements to avoid these disturbances and potential dangers.
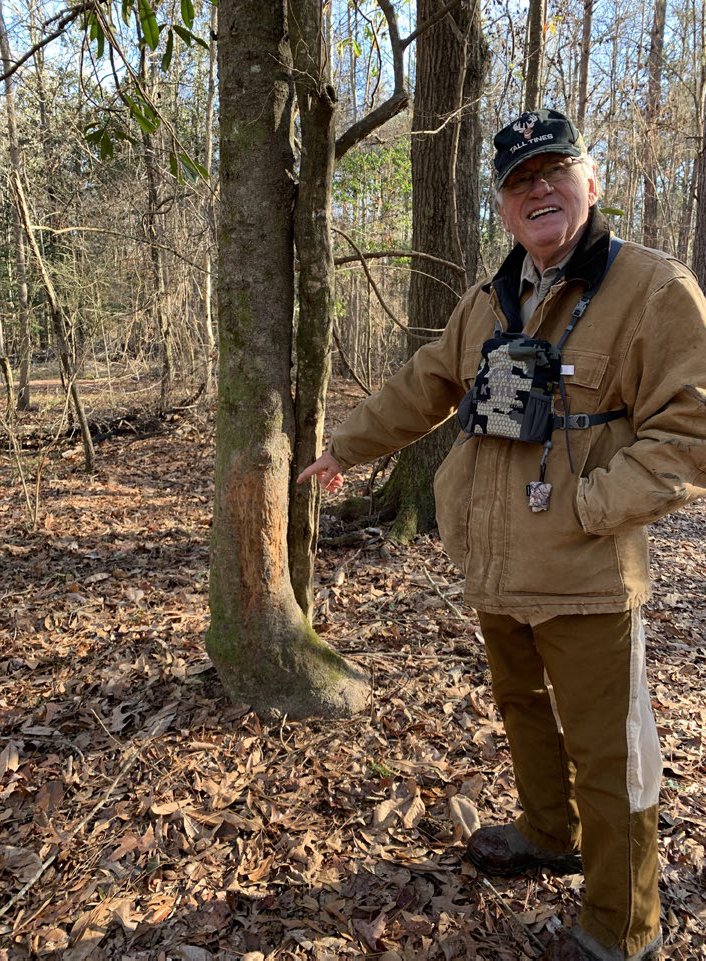
All these things are described by two words – disturbance and pressure. I have spent most of my career helping hunters manage for better deer and better hunting. Generally speaking, growing “big bucks” is relatively easy when hunters follow management recommendations. However, getting these bucks in front of hunters is often the most challenging task I have. One thing that I have learned and have seen play out time and time again is that hunting pressure (which is a culmination of all the unnatural disturbances described above) plays a significant role in hunting success. So, if you want to see and harvest more deer (i.e., improve your deer hunting experiences) intensively manage hunting pressure (and other disturbances) on the property you hunt. One of the best ways to reduce pressure is to be ready well before hunting season. Late winter, or just after hunting season, is one of the best times to learn more about your property, find areas that could be improved, and figure out how deer or other wildlife use your property. Learning these things will help you maximize the value and use of your property. As I have mentioned in past calendars, February and March is my favorite time to learn how deer use a property and strategize on new stand locations. Because deer have been exposed to a great deal of hunting pressure over the past few months, they are using areas that they are most comfortable in and feel safe. If you find out where they are “hiding” now, you will know where to find them next season once the hunting pressure builds and deer seem to disappear. During this time of year, buck sign such as trails, rubs and scrapes are still fresh. Erecting or relocating stands now reduces that amount of “pressure” you will need to apply just before deer season and allows deer to get used to seeing them over the summer. Although you will have to touch them up before the season starts next year, late winter is also a good time to trim shooting lanes around deer stands. Having done all this in late winter, you will significantly reduce pressure just before the season starts next year which will enhance your opportunities to see and harvest the big bucks you’ve worked so hard to grow.