
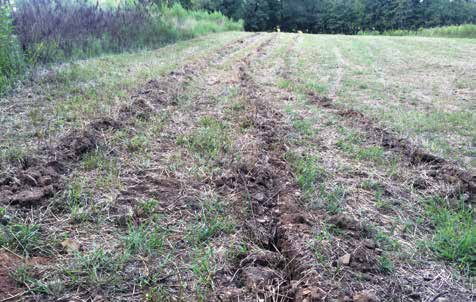
Check food plots for hardpan and subsoil if needed.
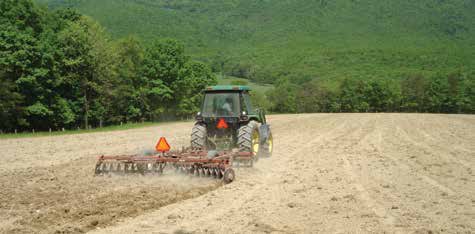
If your food plots seem to either dry up quickly or stay wet longer than expected under normal rain conditions, or if you’ve been planting the same food plot for many years, your food plots may have developed a hardpan. Soil compaction, also called hardpan, may limit or constrain forage production and plant survival in food plots. A hardpan is a densely compacted layer of soil that lies between the topsoil and the subsoil. Depth of hardpans vary but are often 4″-12″ below the surface of the soil and are caused by the weight and pressure of tractors (and other equipment) on the soil and repeated disking/tillage over several years that loosen top soil allowing the finest particles of the soil (clay) to migrate downward, accumulate, and bind creating a very dense layer. Imagine it as a layer of concrete below the surface of the soil. As you would expect, water and oxygen do not travel well through hardpans, thus during periods of adequate rainfall, water may lie in puddles on the surface of the compacted soil and evaporate before it can seep down into the soil. Similarly, during periods of low rainfall, the topsoil of food plots that have a hardpan dries out quickly due to the shallow layer of topsoil and inability to draw moisture from subsoil resulting in stressed or dead food plot crops. Hardpans can be easily detected in food plots using a soil probe, which is a 2′ to 4′ metal rod – sharpened on one end to penetrate the soil, and a handle on the other end to assist in pushing the probe through the soil. As the probe is inserted, the force required to move it through the soil should remain about the same until a hardpan is reached. Upon hitting a hardpan, it will take much more effort to push the probe. From my experience, hardpans in food plots are often 4″-6″ below the surface, which is the depth at which most disks plow, and may be 2″-10″ thick depending on soil type and age of the field. Breaking the hardpan is often referred to as “subsoiling” which breaks up the soil to depths of 6″-12″ and fragments compacted soil allowing water and roots to penetrate into the subsoil. To subsoil, you will need to use a subsoiling chisel plow. Most chisel plows have 1-5 shanks that are set 9″ to 12″ apart. When pulled by a tractor the chisels dig deep into the soil and rip or break the hardpan below the surface. Subsoiling every 2-3 years will benefit soils, keep hardpans from developing, and enhance plant growth in food plots. If you do not own a subsoiler, many companies rent them. However, it is a valuable food plot implement I recommend owning if you manage many acres. Obviously, this is something you want to do before initiating fall disking for planting food plots.
Attend wildlife management seminars
Most landowners and land managers are always seeking more information that will help them best manage their property. In fact, the reason you are probably reading Wildlife Trends is to learn more about wildlife and land management. The more you understand the how’s and why’s of wildlife/wildlife habitat management, the better you will be at managing your property. There are several wildlife management oriented seminars or short-courses that take place during late summer and early fall. These events provide opportunities to speak with foresters, wildlife and fisheries biologists as well as other landowners. A good resource for educational events is land grant universities that have Cooperative Extension Services, state forestry commissions, landowner associations, or other organizations dedicated to the management of specific species such as Quality Deer Management Association, Ducks Unlimited, National Wild Turkey Federation, etc.
Manage dove fields in preparation for the upcoming season
Unless you hunt deer in August in South Carolina, dove season is often the first hunt of the year in the Southeast. Dove field planting activities are normally dictated by the time it takes for the specific crop you plant to mature. Common dove field crops include dove proso millet, browntop millet, Japanese millet, sunflowers, grain sorghum, corn, and wheat, all of which have different seed maturing periods. The goal is to have mature seed available for dove a few weeks before the season starts to allow them time to find and begin using the field. If all goes well, most dove fields are nearly mature by mid-August. As the season approaches, here are a few techniques I have used to increase dove use of the field before a planned hunt:
- Maintain a clean, disked strip or two through the field of bare ground. These are strips that you do not plant. Rather, simply keep plowed through the summer and into dove season. Dove find these bare dirt areas attractive because it is easy to walk in, exposes seeds, grit and offers dusting areas. Disked strips offer access to seed from your plantings once they mature as well.
- If the field has a water hole or pond, make sure dove have access to it. In some cases, this means either mowing or burning the vegetation along a section of the shore will be needed.
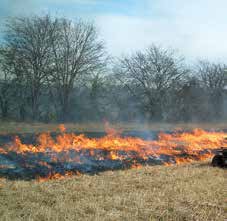
- Once the crop is mature begin periodic strip mowing or sectional burning to allow access and expose seed to dove. I prefer burning if it is possible because it completely cleans the ground allowing better access for dove and exposes more seed. Only a few strips are needed at any one time. The goal is to only mow/expose enough seed for dove to use for a week or so Add another strip or burn another section as dove need it. This method will prolong the life of your dove field by providing seed to dove over several weeks or months.
Start preparations for fall food plots.
It is difficult, if not impossible, to establish successful food plots without planning and adequate soil preparation. Planting quality food plots is a process that may span over several months, not a weekend. There are several factors that influence the success of a food plot program. Among the most important are establishing a well thought out food plot plan, ensuring proper soil fertility and pH, ensuring hardpan does not exist, preparing a firm, smooth seed bed, only planting under favorable conditions, and controlling weeds. Each of these activities plays an important role in the success of your food plots. Here are a few tips on planting this fall:
- Test soil early and apply required lime (preferably at least 6 months prior to planting). It takes time for the chemical process to take place and effectively change the soil pH. If you didn’t lime in spring or early summer, go ahead and apply it now…better late than never.
- Use the results of the soil test to create the best fertilizer blend for your specific soil needs. Many people use balanced fertilizers such as 13-13-13 because they are easy. However, it is well worth your time to custom blend fertilizer to match your needs verses applying a balanced fertilizer that often requires applying extremely high amounts of some nutrients to compensate for the lack of others in the soil – which results in wasted fertilizer/ wasted money.
- Order seed and fertilizer as early as possible to ensure it is ready when you are.
- Ensure plots are relatively smooth. This takes time and should be done well ahead of planting dates. If you are broadcast planting, simply drag the field just before planting to loosen the soil to provide good seed-soil contact. Once broadcasted, cultipack the field to “mash” the seed into the soil (If you’ve never seen or used a cultipacker, check them out. In my opinion it is a “must have” implement that has many applications in food plot planting). Do NOT drag food plots if they are somewhat unsmooth or if you planted small seed such a clover. Dragging will result in burying seed too deep.
- Have seed beds ready, but don’t fall into the trap of planting too early. September is often a very dry month. Mid-October is ideal in most areas of the Southeast. This is when we start getting regular cold fronts that bring rain. Planting too early normally results in disease (mostly army worms), poor planting success due to droughty conditions, or if you receive adequate rain the food plot is knee high and less attractive to deer by the time gun season arrives.
- Adding annual reseeding clovers such as crimson or arrowleaf into your fall plantings will increase the quality, nutritional value, and longevity of your food plots. With proper management, these clovers will produce food well into summer then regenerate again next fall which will save you money on seed costs.
- Use exclusion cages to monitor deer use and plot performance. An exclusion cage is a small “tube” of fence staked to the plot that prevents deer from eating the crop within the exclusion cage which allows you to assess plot growth and deer use of the plot. Cages are normally 2-3′ foot in diameter and 3-4′ tall. I’ve seen many food plots where the manager thought the crop did not do well, when in fact it did but deer simply mowed it down and never gave it a chance to grow.
Mow access lanes through quail hunting areas.
Generally speaking, areas that are being managed for quail hunting are disturbed regularly by fire, disking, and/or applications of herbicide to control undesirable vegetation to promote quality quail habitat. Consequently, the understory habitat in these areas seldom grows taller than 3 feet. However, even with such low growing vegetation, navigating and hunting these areas with bird dogs and other hunters (particularly kids) can be challenging due to the relatively thick nature of this vegetation. While prescribed fire, disking, and herbicide applications are best suited for creating quail habitat, mowing can be used to increase the huntability of the habitat. That is, mowing access trails through quail habitat will allow easier access for hunting. How and where you mow trails is a personal preference. Some people like straight line/checkerboard mowing which results in a systematic appearance and is easier for hunters to figure out where other mowed lanes are while working dogs. While it depends on the situation, I prefer randomly mowed lanes that wind through the habitat. This strategy results in a more natural look. Regardless of the method you use, mowing these trails just before the growing season ends (late summer) will allow the vegetation to grow a little before hunting season/dormant season arrives. I generally try to time this mowing when I feel there are 2-3 weeks left of growing season. The result will be trails that are easily walked but do not appear as though they were just mowed providing a more natural/aesthetic look within the quail hunting areas.
Check and lubricate gates & locks
Servicing gates and locks are often overlooked but is something that needs to be done at least annually. Unattended or poorly working gates can pose unnecessary safety hazards. The first order of business when servicing a gate, particularly one that is not used often, is to inspect for and eradicate wasps and their nests. Nothing can put a damper on a day in the woods like getting stung by a wasp at the gate! Next ensure the gate functions properly. Is it easily opened and swinging level? Are the hinges in good working order? Make notes of parts needed to make repairs if you do not have them handy. To reduce the chances of running into a “no-shoulders” (snake), ensure the gate is free of tall weeds and vines by weedeating or using herbicide (recommended). Lastly, inspect and oil the lock, locking mechanism, and hinges of the gate.
Host a cookout for your neighbors.
Whether you already know your neighbors or not, inviting them to a cookout at your property will not only be a good gesture, but will likely result in new or better relationships that will benefit wildlife on your property. Late summer or early fall is a great time to host this because hunting season is right around the corner and on people’s minds. These are great events to exchange ideas, share management experiences (what has worked and what has not), discuss any problems such as poaching or trespassing issues, or simply getting to know each other better. In most cases, successful deer management, particularly on small properties, requires working with adjacent landowners or hunters to ensure similar herd management strategies are being applied. When several properties are working together towards common goals it is often referred to as a “deer management cooperative.” Obviously the goal is to get as many landowners and hunters to participate as possible so that you have “control of the deer herd” over a larger area. Given the relatively large home range sizes of white-tailed deer, the more land under management the better, and any increase in acreage will improve management success. Other non-biological benefits of getting to know your neighbors may include sharing resources such as tractors, planting efforts, or other equipment. Many neighbors save money by ordering bulk fertilizer, seed, and supplemental feed. I’ve known of several great friendships that have developed through “neighborhood” cookouts.
Install trail cameras to capture photos of deer
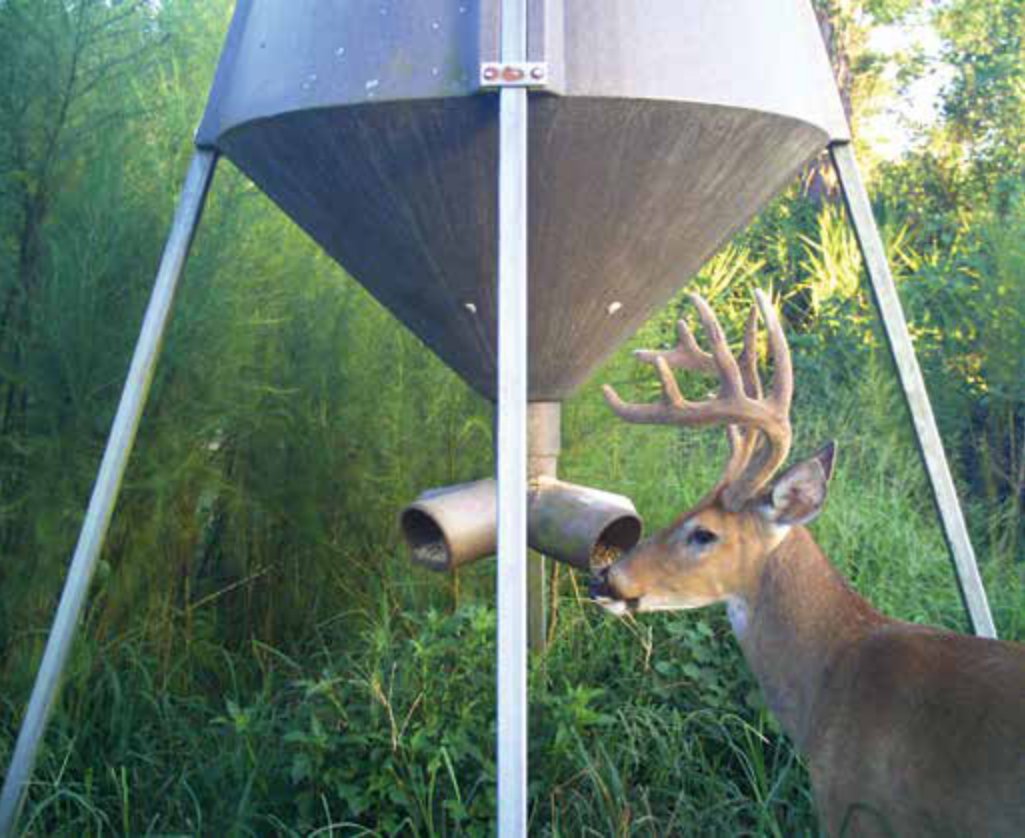
Depending on where your property lays in the whitetail’s range, antler hardening (shedding of velvet) has already taken place or will shortly. Late August or early September is a great time to begin installing trail cameras around your property to capture photos of bucks. During this period, bucks are congregated in loose bachelor groups allowing you to photograph multiple bucks together. Where to place the cameras depends on local food sources and deer activity. In some cases, attracting deer to a camera site with scattered whole corn is most effective. However, mineral licks that were created earlier in the year often make great camera locations, particularly if you have experienced wet conditions. Other locations that may be effective in late summer or early fall include entrance trails to large agriculture fields, along the edge of smaller food plots of perennial crops, summer food plots, or small water holes (if weather is warm and conditions are dry). Naturally, most hunters are anxious and excited to plug the SD card into a computer and run through the photos to see what kind of bucks they have, which is what I do. However, take time afterwards to do a little analysis of the photos. By counting the number of bucks and does in the photographs you can get an idea of the existing adult sex ratio which will help you make harvest decisions. Estimating the age of the bucks you photographed will shed light on the buck age structure. Obviously, a full scale camera survey will provide the most accurate and comprehensive information about the deer herd, but “random” trail camera photos certainly have a story to tell and can help you better understand the status of the deer herd on your property. All of this allows you to make better management decisions that lead to desired results. Photos from trail cameras will also help reduce “mistakes” when judging bucks in the woods while hunting (where judgments are often made in seconds while your heart is racing 200 beats per minute!)