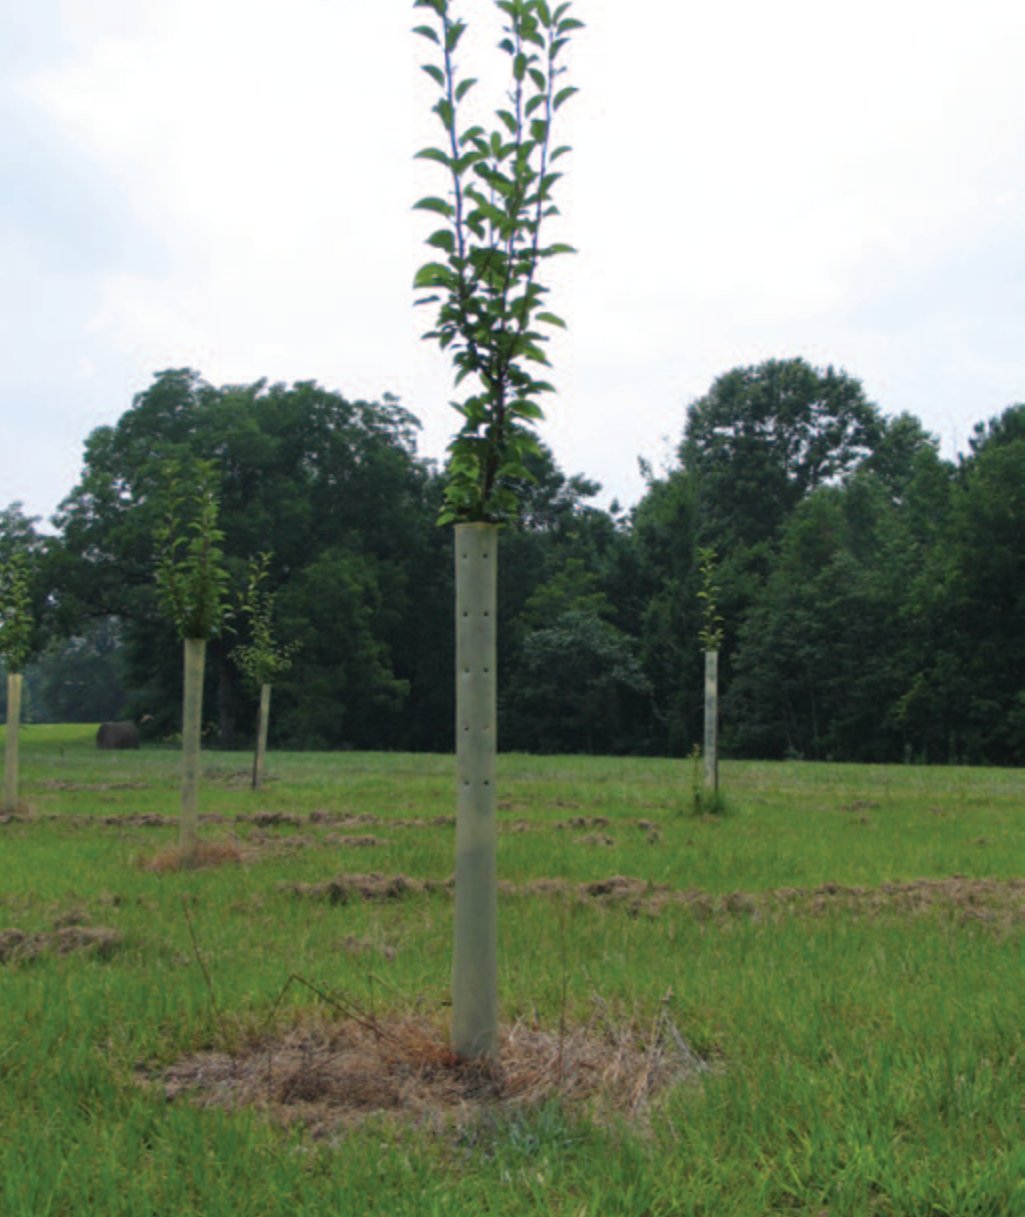
not make it. However, in many cases the tree died from a combination of being stressed from transplanting and not being taken care of (TLC – tender loving care). Simply planting the tree is not enough in many cases. After planting a tree in late winter, tree survival is much higher if you ensure weed competition is eliminated (normally done via application of herbicide) in the immediate area of the tree. Weeds compete with the trees for nutrients and water. Speaking of which, it is important to monitor rainfall and water trees when needed during their first year after being transplanted. Most trees have been propagated and grown in a nursery where they grew in ideal conditions – adequate nutrients, water, and sun. Some trees do not fair well with the struggles of the “real world” where a sprinkler is not providing daily water. Thus, taking a little extra care of them during their first year will help them adapt and develop a root system that can better handle periodic droughts. Another helpful tip is to place 3-4″ of mulch around the base of the trees. Mulching will reduce weed problems due to the unfavorable germination conditions under the mulch (no sunlight) and will also conserve soil moisture. I mention this in the June/July calendar because this seems to be when the highest mortality occurs, which makes sense due to the very hot and dry conditions during this time.
Take care of fruit trees or other tree plantings
Many landowners, wildlife managers, and hunters are beginning to incorporate fruit trees into their wildlife management program to provide additional food sources and aesthetics to their property. Many have taken great care in deciding where to plant these trees, dug the appropriate sized hole, loosened the surrounding dirt, added time released fertilizer and moisturizer, firmly packed soil around the root ball, and added a tree tube to protect the tree and enhance growth – then walked away to later find the tree died. Due to the transplanting process itself, which causes a good bit of stress on a tree, some trees simply do
Identify and control invasive exotic plant species.
Exotic species are very competitive with native plants and can take over your property and compromise habitat quality. The best time to control or eradicate exotic plants is often during the growing season. Strategies to control these plants vary depending on the species at hand. However, herbicide (and fire in some cases) will likely be the tool of choice. It is much easier to control exotic species if you catch them in the early stages of colonization. Once they have a foothold, eradicating can be extremely challenging. Some of the common invasive exotics in the Southeast include Cogongrass, Chinese tallow tree, Kudzu, Chinese Privet, Chinese Lespedeza, and many others. A great field guide to keep on hand is “Nonnative Invasive Plants of the Southern Forest” by James H. Miller. You can get this publication from the USDA Forest Service – Southern Research Station at Auburn University or visit http://www.bugwood.org/weeds/forestexotics.html. This guide has information regarding identifying invasive exotics as well as methods of controlling them. Another resource is the Florida Pest Plant Council – www.fleppc.org.
It is also wise to consult with a professional herbicide applicator before deciding which herbicide and method to use. Besides the complex world of herbicides themselves, mixing and applying them can be complicated as well.
Plant chufa for turkeys.
Chufa can be planted in May or June in the Southeast, but most plantings occur in June when summer rains start. Monitor chufa plots for competing grasses and weeds and apply herbicide accordingly to control. Adding chufa to your planting program can be quite rewarding if you like to see or hunt turkeys. Turkeys primarily utilize chufa in the fall, winter and spring once the tubers have developed. If your property have never seen chufas, you may need to lightly disk a strip through the patch in late winter to expose tubers. Once turkeys find them, you will not be able to keep them out. A word of caution – raccoons and hogs like chufas as well and can pose problems in some areas. Chufa patches can often be regenerated the following spring by lightly disking the areas. There has to be adequate chufa seed remaining to regenerate an adequate stand (there’s often more left than you may think). To regenerate the stand, lightly disk the plots once in April, again in May, and once more in June. The key is to continue disking each month regardless of how nicer your plot is growing with chufas – it’s going to kill you, but do it. Be sure to rotate your chufa patches every 2-3 years to avoid nematode problems.
Improve habitat edges.
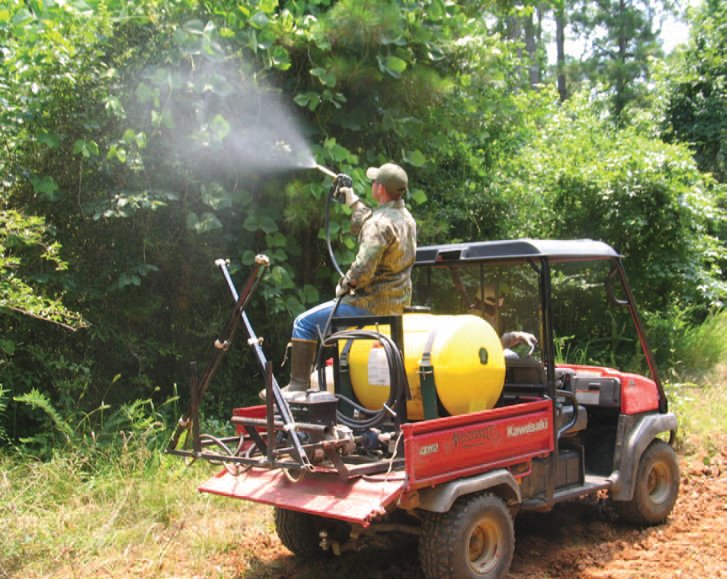
Most game species of wildlife travel, feed, and thrive along habitat edges. Habitat edges or “ecotones” occur where two habitat types merge or join. The most noticeable are edges created where woods meet fields, but edges can be as subtle as the transition of a brushy creek to a stand of young hardwoods. Improving the quality of edges and the food they provide will increase the wildlife value of your property. Although “interior” edges are more difficult to manage due to access, improving the quality of edge habitat along roadsides, food plots, and fields is relatively easy. There are many methods used to enhance edge, but applying selective herbicides generally produce the best and longest lasting results. Application of herbicide can be made with a backpack, 4 wheeler, ATV, or tractor mounted sprayer. Simply apply herbicide along the edge spraying as far into the edge as you can. The goal is to remove undesirable mid-story woody species such as young sweetgum and ash trees to encourage increased growth of plants that will benefit deer, turkey, and quail, like legumes, forbs, and blackberry species. If possible, include these areas in prescribed burns the following year to remove “skeletons” of the trees and underbrush you killed via herbicide and to stimulate additional desirable plant species. Another tip is to include managed edges when you fertilize food plots or fields. In addition to removing undesirable trees/shrubs that compete for sunlight and nutrients, fertilizing these areas can significantly increase the amount of foliage the remaining desirable plants produce.
Start preparing and planting dove fields.
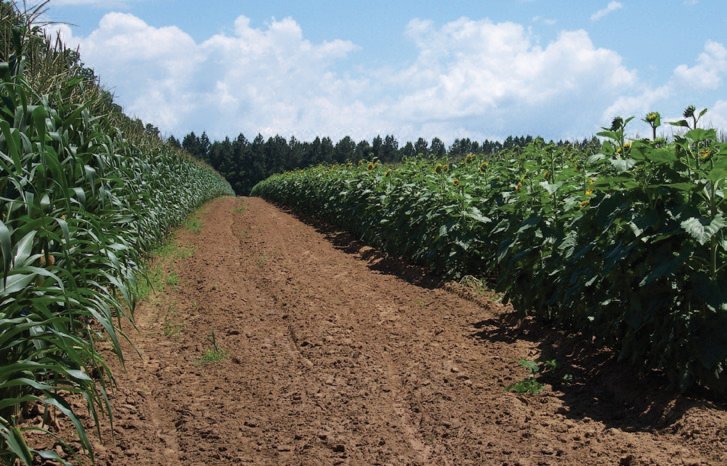
Dove field preparations should begin by July. Planting dates will depend on the soil moisture, crops you are planting, and the time required to produce seed. Common dove field crops include dove proso millet, browntop millet, Japanese millet, sunflowers, grain sorghum, corn, and wheat. For best results obtain soil samples and apply required lime and fertilizer before planting. Be sure to allow enough time for your crop to produce seed before dove season arrives. If you are in a pinch or running behind on your planting, browntop millet is a good choice for dove or ducks because it only takes about 50 days to produce seed. One trick that we often implement on dove fields to create hunting blinds is to plant strips of Egyptian wheat or sorghum Sudan.
These plants can grow 8-10 feet tall and will provide adequate cover for hunters. Another option is to simply hand sow the seed where you want hunting blinds to be. This will create small “islands” for hunters to use. These tall crops also provide shade for hunters during the early part of dove season when temperatures can be hot.
While the seed of planted grains offer attractive food sources for dove, maintaining a clean disked strip or two through the field offers dusting areas for dove. These are strips that you do not plant, rather simply keep plowed through the summer and into dove season. Dove find these bare dirt areas attractive which will keep them in and around your field until grain seed is mature. It also offers landing areas and access to seed once it matures as well.
Conduct summer quail call counts.
Call counts conducted in June provide an estimate of the number of males available for breeding and an evaluation of winter survival. This information allows you to monitor the quail population’s response to habitat management efforts and quail production. To obtain an index of male birds, set up several “listening points” on your property that can be used each year. Listen for whistling males for the first 1-2 hours after sunrise. In June, nesting by females is at its peak in many regions, so males will be actively calling. To standardize the call count, arrive at the first station at sunrise, wait one minute to allow vehicle disturbance to settle, then listen for five minutes and record the number of male quail heard. Count the number of different individuals you hear. Continue until all stations have been monitored. You will need to conduct the call counts at least 5 different days for the most accurate estimates. The more counts you conduct, the more accurate your estimates will be (statistically speaking). We often conduct 10 call counts (10 different mornings) each June. After completing the call counts, calculate the average number of calling males heard per station. This is your “index” and the number in which you will compare against future call count data to assess increases or decreases. The key to accurate year-to-year counts is to be consistent about everything you can control: same people listening, same locations, same kind of weather (clear, windless days) same week of the year, and the same time of day.
Widen roadsides to create roadside management areas
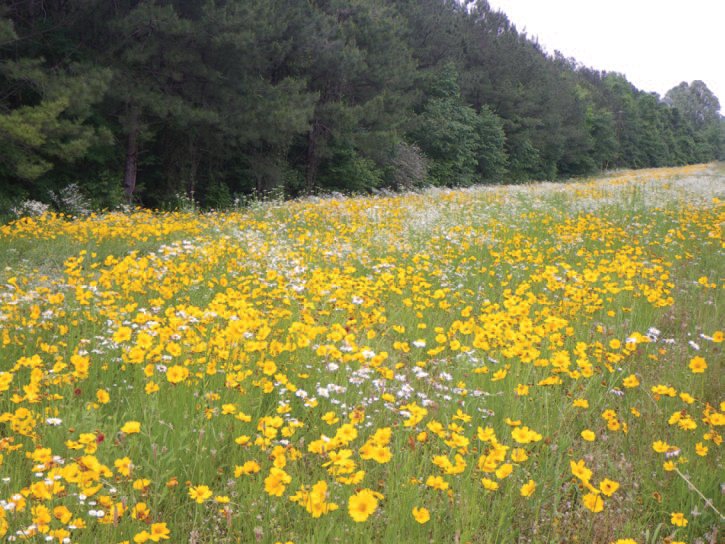
Summer is a great time to create roadside management areas throughout your property. Creating roadside management areas can add wildlife and aesthetic value to your property. Regardless of how intensely you manage these areas, they will create more “edge” habitat which is preferred and used by most game animals. To create a roadside management area simply clear the understory and undesirable trees along a roadside, lime/ fertilize as needed, and periodically mow to maintain control of encroaching trees species and maintain a relatively low understory (avoid keeping a “manicured” look by mowing roadways often – this does not offer as much wildlife value). How wide you make the area is site specific, but they are generally 10-20 yards wide. Be sure to leave a few desirable mature trees within the managed area. These trees will provide shade to conserve soil moisture in the summer and will add aesthetics along the road. If you desire to intensively manage your roadsides you can seasonally disk or burn them to promote desirable weeds, and/or install wildlife plantings such as clovers, sorghum, or wildflowers. Wildflowers provide both aesthetics as well as bugging areas for turkeys. Managing roadsides will not only increase the aesthetics of the property and add wildlife value, but will increases wildlife viewing opportunities.
Avoid mowing wildflower areas until seedpods have matured
Managing wildflower areas is a great addition to your property management strategies, particularly if one of your goals is improving habitat for turkeys and quail. They not only add aesthetics which adds to your outdoor experience, but the flowers attract an abundance of bugs and insects that are eaten by turkeys and other birds. If you have planted or are managing wildflowers on your property, avoid mowing these areas until seedpods have matured. Allowing the wildflowers to produce seed before mowing will ensure adequate reseeding for a good crop the following year. If you are not currently managing wildflowers on your property, but want to do so, do your homework to determine the best wildflower blend for your particular soil and climate, begin preparing seed beds well before planting time (fall) to create a smooth firm seed bed, and plan to plant them this fall. Due to the small seed size of many wildflowers, a smooth seed bed is critical to success. Rough seed beds often result in seeds getting covered too deeply and will result in low germination rates even if broadcast by hand. Once established, and with periodic management, such as mowing, wildflower areas can persist for many years.
Complete draining duck ponds and prepare for planting.
If you are managing a moist soil area/ duck pond (native vegetation vs. planting agricultural crops), you should have started the spring drawdown around 45 days after the last frost. Slow drawdowns, those that take 2-3 weeks, are desired because they result in a more diverse wetland plant community than rapid drawdowns. A diverse community of wetland plants will result in many different types of food sources (seeds and insects). By May or early June, your drawdown should be complete and native moist soil plants are starting to establish. Herbicides can be a useful tool to remove undesirable vegetation if it becomes a problem and is dominating the pond. Button bush and sesbania (wetland shrubs) can be beneficial, but should be kept in check and not allowed to comprise more than 25% of the pond.
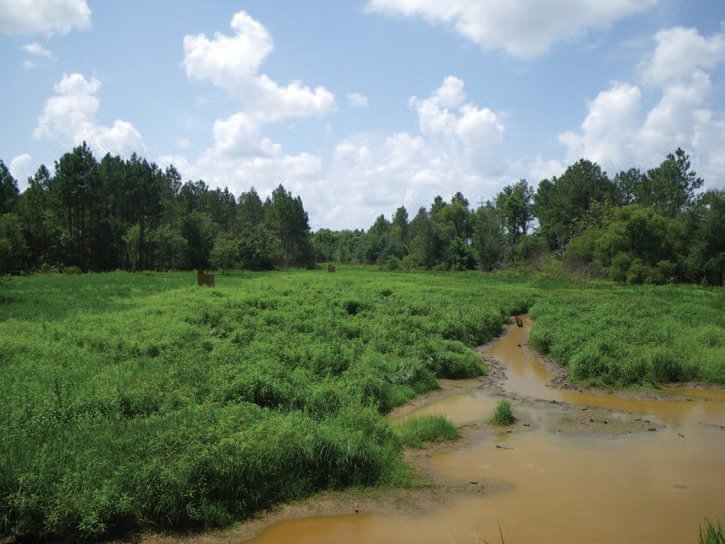
If you plan to plant an agricultural crop rather than manage the native vegetation, leave the pond flooded until closer to planting time. That is, drain ponds you plan to “plow and plant” a few weeks before you start plowing and preparing the soil for planting. Leaving the pond flooded until this time will provide weed control and will reduce tractor time later. Drying time will vary depending on your soils. It is better to drain early than to wait and not be able to work the ground because it is too wet and chance running out of growing season. My personal favorite crop for duck ponds is rice. Rice, however, requires more time and effort to manage and takes about 120 days to produce seed (depends on variety used) so you need to plant it early. For best results obtain soil samples and apply required lime and fertilizer before planting. Japanese millet is also a favorite of ducks and is easily grown by duck pond managers. In fact, Japanese millet can be top dressed or broadcast onto mud flats of a wetland or beaver pond. Japanese millet is a strong re-seeder, meaning that it will produce seed that will germinate the following year.
Conduct warm season or summer prescribed burns.
Warm season burns are an exceptional tool for managing quail habitat. Warm season burns are generally conducted from June through August. However, extreme caution should be used when conducting summer burns. Due to higher ambient temperatures and low relative humidity, summer fires can get very hot and difficult to control. If the area you plan to burn has a heavy fuel load (understory shrubs, grasses, and thatch) or has not been burned in over 3 years, I recommend initially conducting a cool season burn (December – March) to reduce fuel loads before attempting a summer burn. Fire rotations (interval of time between burning the same area again) for summer burns vary depending on your goals and habitat types but are generally every 1-2 years to promote quality wildlife habitat. Regular warm season burns will often promote native warm season grasses that are desirable for quality quail habitat. It is also a good idea to strategically plan your burns so that you always leave some areas unburned. This will help to maintain diverse habitat types which will enhance the wildlife value of the area. Always check local burning laws and consult with an experienced burn manager before lighting a woodland fire. The U.S. Forest Service or your state forestry commission are great sources for obtaining more information regarding burning in your area.
Establish mineral licks to photograph deer
While the nutritional benefits of providing mineral licks for deer have not been well studied, they are cheap to create, deer use them, and they do not appear to have any negative nutritional effects. In fact, most deer biologists think there are nutritional benefits of providing minerals for deer. Deer tend to use mineral licks the heaviest from summer through early fall. With the price of corn getting so high, mineral licks are a good alternative to attract deer to camera sites. The key however, is to establish the mineral licks early in the summer to allow deer time to find them and begin using them. My experience with mineral licks has been that the longer they have been established, the better they are. Rains dissolve the minerals and saturate the stump or area they are placed. Evidently “leftover” minerals or salt that attracts them lingers and deer often come back to the same site the following year. Having said this, corn is still the “go to” attractant if you are conducting a true camera census on a property, but mineral licks offer a cheaper way to get deer in front of cameras for “casual” photographing.