Conduct pre-season projects that will help reduce or minimize deer hunting pressure and disturbance.
Hunting pressure and disturbance on a property significantly impacts the hunting quality or number of deer you will see. I have thousands of hunter observations over many years that show as more pressure is applied fewer deer (particularly mature bucks) are seen. Here are a few things that will help minimize hunting pressure:
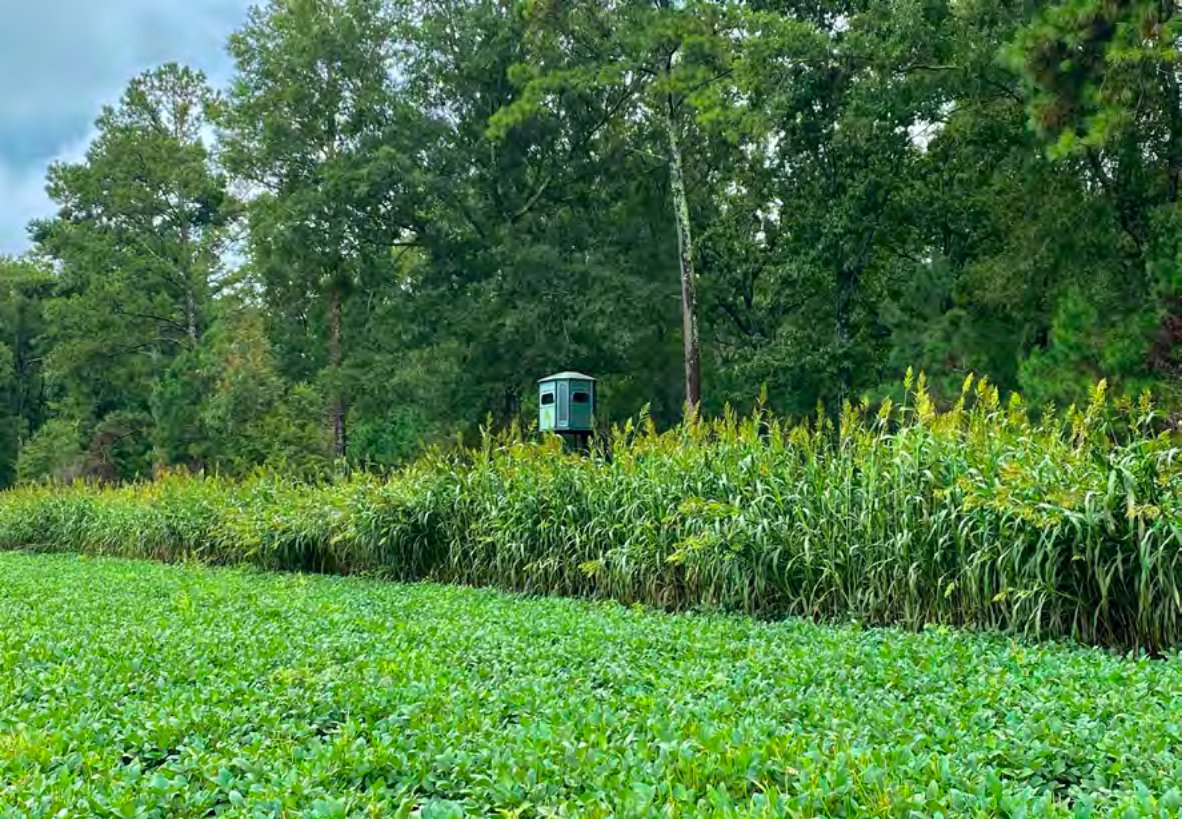
- Position stands around food plots so that hunters can enter and exit them without spooking deer that are in the field. By this I mean place stands slightly inside the woods and/or plant a “screen” that will protect the hunter from being seen by deer in the field. Good screens include standing summer crops such as corn, Egyptian wheat, Sorghum Sudan. Other more permanent screens (which I prefer) include switchgrass, or evergreen type shrubs, or conifers (e.g., pines or cedars). Simply leaving a small portion or strip of the food plot fallow for a couple years will allow natural vegetation to grow and create a good screen. Once stands are placed inside the woods, simply cut shooting “windows” for hunters to see and harvest deer on the food plot.
- Inspect stands to make sure they are safe, but from a disturbance standpoint, check for noises. Oil squeaky chairs, windows, doors, etc. Move around in the stand. Does it creak? Find the source and fix it. Ladders may simply need to be tightened. These little noises can ruin a hunt and disturb deer for future hunts.
- Cut and clear trails for hunters to get to and from the stand without making a lot of noise. Clean these trails regularly with a rake or leaf blower if needed.
- Determine favorable wind directions for each stand and do not hunt the stand unless the wind is right. At my camp, we have a list of stands for each wind direction. We check the wind, review the list, and hunt accordingly.
- Look at a map of your property and determine if there are roads that may impact or disturb deer or other wildlife. Close these roads down before and during hunting season and only travel them on a “need to” basis.
Besides effectively managing the deer herd, the key to having high quality hunting experiences it to keep hunter-based disturbance on the property to a minimum. For more detailed information on managing hunting pressure refer to an article titled “Steady Under Pressure” that was published by Wildlife Trends.
Create a seed scale to ensure accurate seeding rates are applied when planting food plots.
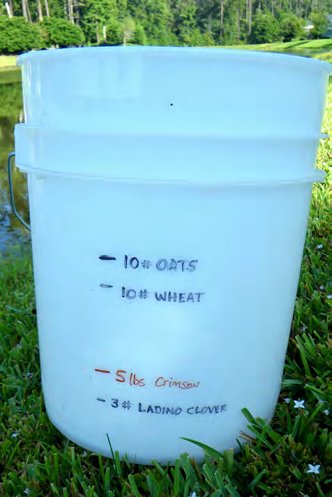
How many times have you ever been in the woods planting a food plot and had to guess on the amount of seed to pour into the spreader for that particular food plot? I am certainly guilty of doing this. Here’s a tip that will help you more accurately measure the amount of seed to put in the spreader. Before going to the field, use a bucket (3- or 5-gallon size works fine) to weigh the various types of seeds/blends you are using. Once you are at the desired weight for each seed type (e.g., 10 lbs. of oats), use a sharpie to place a mark (and weight) on the bucket. It helps to use a relatively clear bucket so you can see the amount of seed from the outside. Due to the size and weight variations in different seeds or blends, you will need to follow this process for each of the different seeds or blends. For example, you may have a mark for 10 lbs. of oats and another for 5 lbs. of crimson clover. Once marked, the bucket can serve as an accurate “measuring cup” to measure seed being placed in the spreader. This will ensure proper seeding rates are applied on the acreage you are planting.
Coordinate food plot planting with good soil moisture.
October through early November are often the best months to plant fall food plots in the Southeast. The goal is to plant when conditions are favorable for maximum seed germination and plant growth. Do not fall into the trap of planting too early. Unfortunately, many landowners and hunters plant in early-mid September. Some hunters, particularly hunting clubs, even pick a specific weekend that food plots will be planted well ahead of time and do not have a clue what the soil conditions will be like…. but they plant anyway because “that’s when we plant every year”. This is often a very dry period across the Southeast which could lead to food plot failure. If planted in September and you are lucky enough to receive adequate rainfall, food plots may grow rapidly which will result in over mature (i.e., high/tall) food plots by the time hunting season arrives. If an abundance of acorns are present during this time, plots receive less browsing pressure by deer which allows the plots to grow even more. I commonly get calls from hunters in November asking why deer are not really using their food plots. The most common reason is the crops were planted 2 months ago and the crop/food plot plants are mature, not vigorously growing, and “hardened” up making them less palatable. There is also increased chances of army worm problems in September when temperatures are warm. In most areas of the Southeast more consistent rainfall events begin in October as cold fronts move south. Planting “later”, (meaning in October-November), will also result in young, tender food plots that are extremely attractive to deer and other wildlife during hunting season. When planted under the right conditions (adequate soil moisture), plots germinate quickly and deer will begin using them within two weeks after planting. My point is to not feel rushed to get seed in the ground. Focus more on planting under favorable conditions. There have been several articles related to food plots and planting strategies in past issues of Wildlife Trends. Refer to these articles for more detailed information.
Make final preparations to deer stands.
When deer stands are being properly managed most of the work is done well ahead of the opening day of deer season. There is no mad rush to get things ready. There is no scouting needed just before or during the season that sets the alarm off to every deer in the woods (because you did all the scouting last winter). The only things left to prepare stands for the season should be making a final visit to each stand to tighten and/or replace straps, ensure everything is secure and safe, shooting lanes are clear, pull up ropes, cushions and other accessories such as lifelines are in place, and access trails are cleared of obstacles and trimmed where needed. If possible, tie these final trips to hunting stands in with food plot work. While you and others are already in the area and making lots of noise plowing and planting the plots, slip in and make final adjustments and checks. As a tip, use colored flagging to mark stands that have had their “final check” and are ready to hunt. If you do this, simply use a different color each year. That is, if you used blue tape last year remove it during final inspection and use orange flagging this year. When a hunter sees the orange flagging at the base of the stand, they know it has been checked and is ready to hunt.
Harvest Deer – from a management standpoint.
Although biologists provide guidance on how many and which deer to harvest, hunters are the real deer managers. Remember that each time you pull the trigger you are making a deer management decision. In fact, not harvesting a deer is a management decision. Unfortunately, I see many landowners with goals of producing high quality or trophy bucks that are allowing the deer herd to overpopulate because they like to see 20+ deer when they go to a stand. This situation often results in a poor-quality deer herd with significant dispersal of deer to surrounding properties, less reproduction and fawn recruitment, and ultimately poor-quality antlers. If your goal is to manage for a quality or trophy deer herd, harvesting an adequate number of deer each year is essential to keep the deer herd and habitat healthy. In addition to maintaining a desirable deer density, harvest is the primary tool used to manage the adult sex ratio of a herd. Maintaining a balanced sex ratio will result in a much healthier deer herd, better quality bucks, increased fawn survival, and exciting hunting. Balancing the adult sex ratio is also one of the tools I use to increase breeding competition and get mature bucks on their feet so that my clients can see or harvest them (which is always more challenging than growing them!). When harvesting does, especially early in the season, make attempts to do so in a way that minimizes hunting pressure and preserves hunting quality on the property. When possible, avoid harvesting lots of does on food plots before the rut if you plan to hunt the food plots for mature bucks later. There are always “low impact” options for taking does. Places such as woods stands, powerlines/gas lines, or clearcuts are great choices.
Collect data from harvested deer.
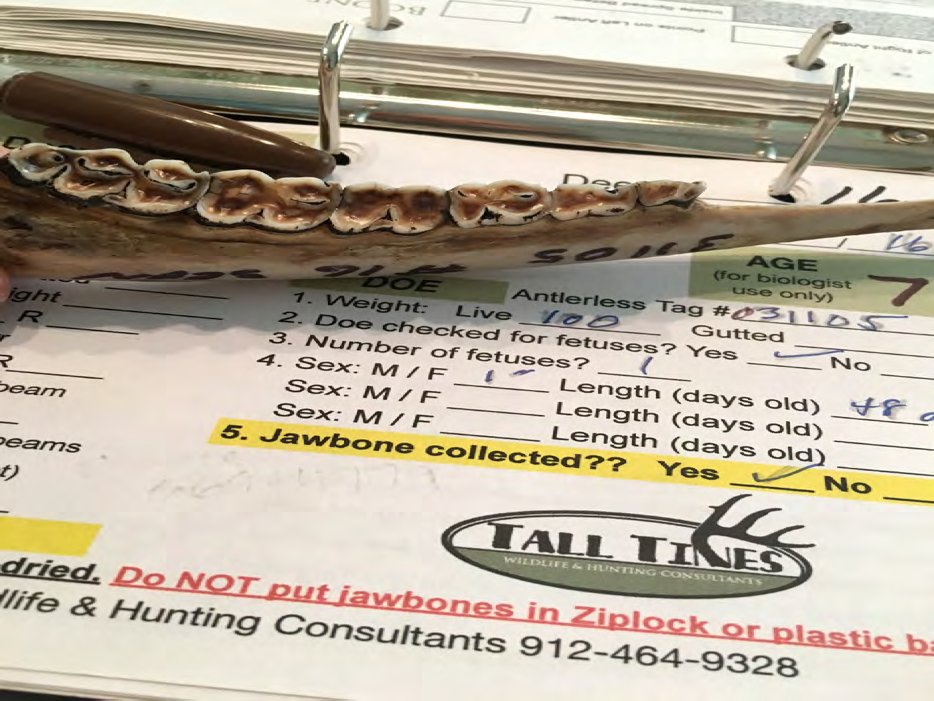
This information is the “backbone” of your deer program and allows you to monitor/assess its success and make sound management decisions/adjustments if needed to reach your deer management goals. Collecting this information each year is important because it will allow you to assess trends in the harvest and observation data which will help you determine if your program is working and where adjustments are needed. Without this information, you are simply guessing and are less likely to achieve your goals. Contact your local state wildlife biologist or a wildlife consultant to determine what information/data you need to collect. Be sure to stock your skinning shed with the needed data sheets and tools needed to record data before the season starts. Other preparations include calibrating scales, inspecting/repairing and oiling the winch used to hoist deer, checking water hoses and nozzles, cleaning walk in coolers if needed, etc.
Develop a winter burn plan.
Because most landowners and/or hunters will be spending a good bit of time on their property this time of year, October is a great time to identify areas needing fire and to develop winter prescribed burn plans. Burn plans do not have to be super complicated. However, the detail required in the plan will depend on whether you will be burning yourself, or if you are hiring a contractor to conduct the burns. If you are hiring someone, like the Division of Forestry or a private forestry consultant, your goal is merely to identify the areas you think needs to be burned. Once you have a rough idea of areas to burn, I recommend spending some time touring the property with the contractor to further discuss each area and ultimately to get aligned on specific areas to burn this winter. Once each area is identified, a more detailed burn plan can be developed. Such a plan would include prioritizing areas to burn, what type of management is required before burning (such as installing or refreshing fire breaks), which burning techniques or strategies to use to achieve desired results, and the range of fire weather that would allow safe burning of each burn area. A burn plan is a written prescription for conducting a prescribed fire including critical elements such as the weather conditions under which the burn will be conducted, number of personnel and duties of each, and the type, amount and placement of equipment needed to safely conduct the burn. As most know, fire is an exceptional tool for creating and managing for quality wildlife habitat. Developing a prescribed burn plan will provide a guide to ensuring burns are conducted under favorable and safe conditions. Developing burn plans now will ensure that you are ready once conditions are right this winter.
Conduct a camera survey to assess the status of your deer herd.
Monitoring the status of your deer herd is very important to the success of a deer management program. Collecting and recording harvest data (weights, measurements, ages, etc.), hunter observation data (number, sex, and quality of deer you see while hunting), as well as population surveys provide information about the deer herd that will allow you to make sound deer management decisions and adjustments in strategies where needed to accomplish your goals. Without this information you are simply guessing. If you are like me, you spend way too much time, money, and energy managing your property to just guess on how many and which deer to harvest. I want to know. Conducting a camera survey is the best tool available to assess the status of your deer herd (number of deer, buck quality, fawn recruitment, etc.) and make buck harvest decisions before you head to the woods. The best times of the year to conduct a deer survey is when natural food availability is at its lowest which is generally late summer/early fall and late winter before spring green up. Most managers conduct fall surveys (September through early November) because they also use the photographs to make buck harvest decisions before hunting season. The ideal period to conduct a fall survey is soon after bucks shed velvet but before many acorns start to drop.
Regardless of whether you conduct a full-scale survey or simply use cameras to scout, photographs from trail cameras are a great tool to assess buck quality and make buck harvest decisions before the moment of truth in a deer stand. I have seen many young bucks with great potential make it another year because they were placed on a “do not shoot” list. If you are using the trail camera photographs to make buck harvest decisions, late summer or early fall is when you need to deploy them.

Scout from the skinning shed.
How many times have you found a great place on your property to hunt that had everything – great food sources, cover, maybe a few deer trails and rubs… set up a stand, sit there all day with anticipation and never see a deer? Or worse yet, have you ever convinced yourself that “this is the place, it’s just a matter of time” and spent a weekend committed to a single stand and not see much of anything? I have, and it isn’t much fun! Don’t get me wrong. I don’t have to kill a deer every time I go to the woods, but I certainly like to see some action. It was very likely that the area I was hunting was indeed a “good area” and had all the ingredients of a prime spot, but the deer simply weren’t using it at the time. It is also very likely that there were either abundant food sources or more preferred food sources available somewhere else on the property. Like me, deer are slaves to their stomachs (or rumens). They feed many times each day. Thus, food is what drives most deer movement. Deer movement results in successful hunts. The key is to know where deer are bedding or loafing, which food source they are using, and position yourself in a strategic location near the food source, bedding area, or between the two. This sounds easy, right? However, it is difficult when and if various food sources are available for deer.
Effectively scouting by traditional techniques is certainly necessary to consistently have successful hunts. However, traditional methods require a good bit of time and energy on your part, which for most of us is limited. Besides the time required, traditional scouting techniques require the hunter to “ramble around” the woods disturbing deer and leaving a lot of scent behind. This is where scouting from the skinning shed comes in handy, will minimize “scouting pressure”, and can save precious time that can be spent on stand.
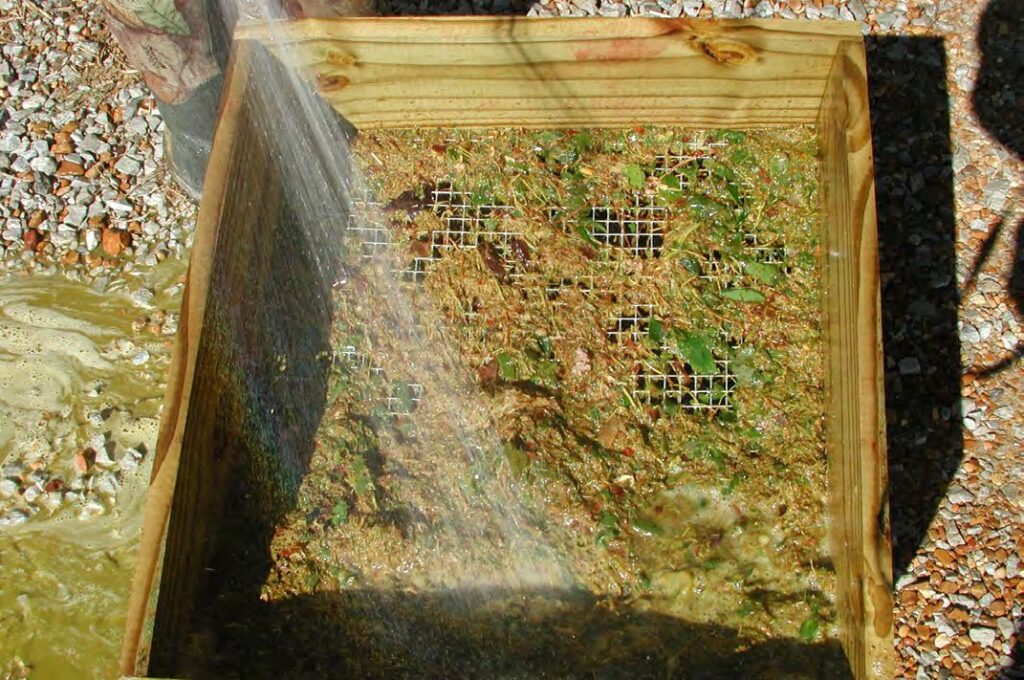
Scouting from the skinning shed simply refers to inspecting the rumen contents of harvested deer to determine available and preferred food sources that deer are using at that particular time of the season. “At that particular time” is important because food sources change from week to week. To do this, simply cut the rumen (stomach) open and look to see what’s inside. A word of caution: if the rumen is bloated or tight, release pressure slowly with the point of your knife before slicing….and turn your head or you may be inspecting your own stomach contents! Although the contents often look like a green gooey mess, with some inspection, the primary food sources the deer has been eating should be obvious. It helps to dump the contents on the ground or concrete pad and run some water over it. I keep a “scouting box” at the skinning shed that makes the job easier. The scouting box is nothing more than a wooden box with a hardware cloth bottom. This box allows you to dump the stomach contents onto the screen and wash away the more digested/fine particles leaving only the larger pieces behind. Stomach contents often include various leaves and acorns. Simply identifying what deer are eating will help you focus on specific areas of your property leading to more productive hunts.
Use the time lapse feature of trail cameras to scout food plots.
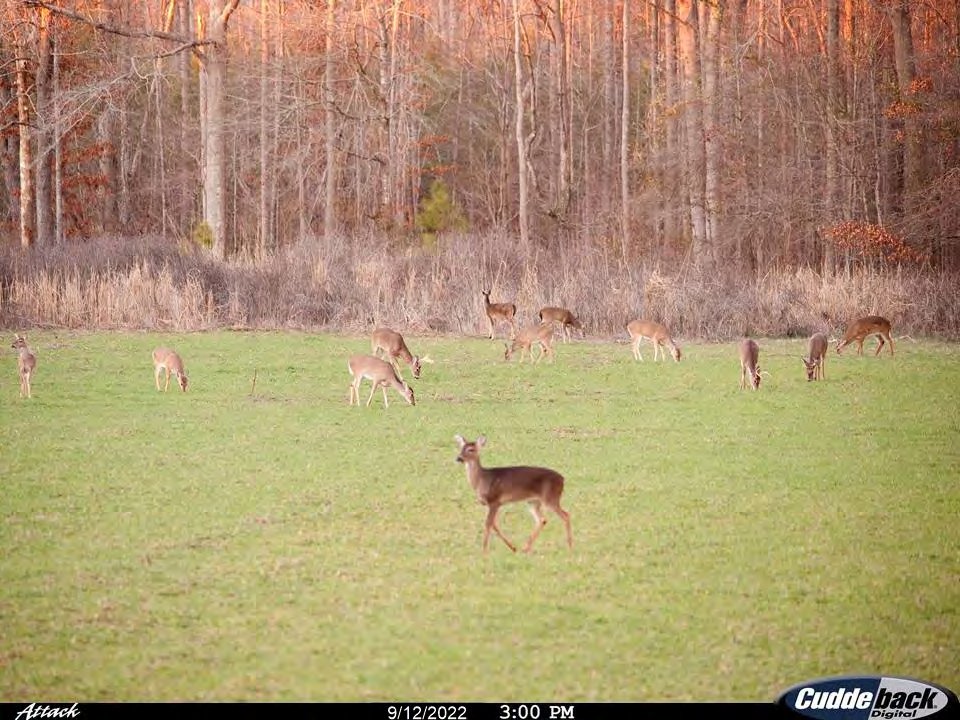
Using the time lapse may be the most overlooked feature of modern trail cameras. If you have not used it before, it essentially triggers the camera to take photos at set intervals. For example, you may set the time lapse to trigger the camera every 30 seconds during a specified time period. That is, photos are triggered by a time interval verses animal movement across the infrared sensor. This feature has opened up a whole new way to effectively scout fields, food plots or other openings. In the not-so-distant past, the only way to scout these areas was physically watching these areas either from a hunting stand or another vantage point. This not only took time, but was done at the risk of alerting deer or turkeys and adding “hunting pressure”. However, using trail cameras set to operate on time lapse feature only requires two quick visits to the area (ideally during mid-day to reduce chances of disturbing deer or turkeys) – one to set the camera up; and after a period of time, one to pull the SD card. Installing a trail camera to monitor a field or food plot requires a different set up than the standard set used to monitor trails, scrapes, or bait. For best results, I have found that installing cameras 10-12 feet high and slightly angled down towards the field works well. Although you could use a small ladder (which is the safest method), I normally pull the ATV, tractor, or cart (whatever I’m driving) up to the tree then stand on top of it to install the camera. Depending on the make of the camera, there are many “delay”/or interval options for the time lapse. Obviously, shorter delays will result in more photos but will consume batteries quicker. I have found that setting the time lapse to operate the first couple of hours after daylight and the last couple before sunset at intervals of 1 to 2 minutes work well. At this setting, you will get enough photos to identify where and when deer enter the field over a week or so. Although the time lapse feature is great to determine when and where deer enter and use a field, it is generally not good for identifying details of a particular animal unless they are relatively close to the camera. If I see a specific animal I am interested in (like a buck that is a potential “shooter”), I use the time lapse to identify where he is entering the field, then find the trail and install a trail camera in the normal fashion.
Flood duck ponds to “full pool” by early to mid-November.
Monitor water levels in duck ponds as fall arrives. Many areas in the Southeast have been fortunate and have gotten abundant rains so far. However, too much water too early can be bad for growing duck pond crops/plants. Water control structures allow managers to regulate water levels and are valuable tools when a rain event such as a tropical storm comes through. Once your crop matures, allow ponds to slowly flood to “full pool” as November approaches. Ideal water depths for dabbling ducks such as mallards, gadwalls, wood ducks, etc. is 12-18″ with pockets of 4″-6″ depths. The reason to have ponds flooded 2-4 weeks before the hunting season opens is to give ducks a chance to find your ponds and get used to using them. Flooding too early (more than a month before the season) may result in seed deterioration resulting in less food later during the late season. For good hunting throughout the season, do not over-hunt your duck pond and allow a “rest” period between hunts. If you have several duck ponds, designate one as a “no hunt area” to provide a place for ducks to loaf. This will keep them on your property.