
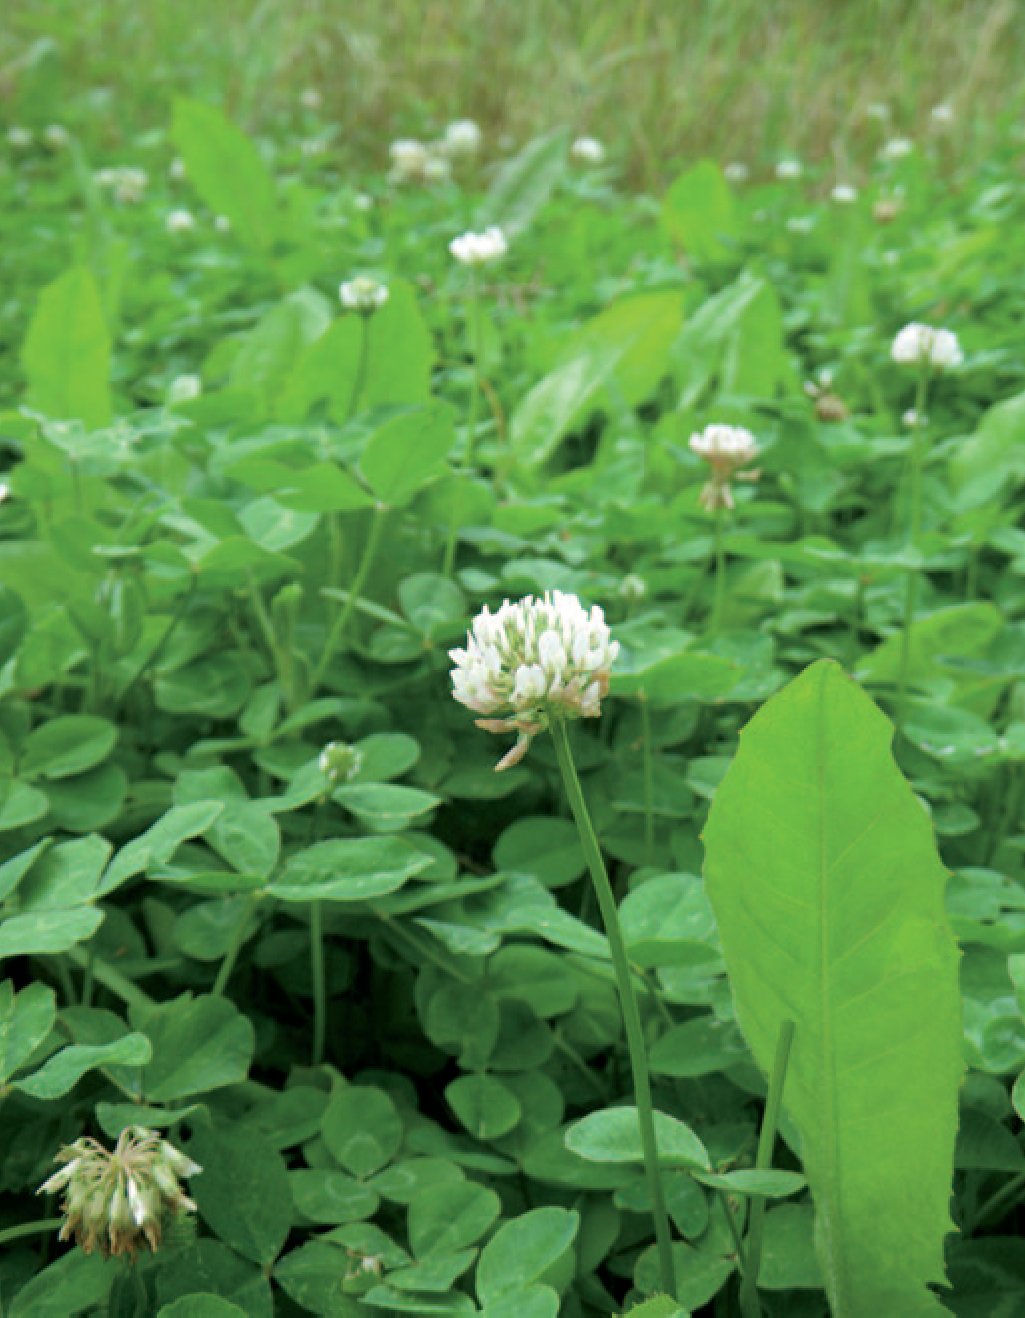
Planting food plots for wildlife has become very popular among hunters, land managers, and landowners to improve the wildlife value of their property. If you own, hunt, or manage a hunting property, you have probably planted a food plot or two. However, even with all the “how to grow food plots” information available in books, DVD’s, TV shows, and internet sites, I routinely see poor or unsuccessful food plots on properties I visit. Because of the food plot “movement”, the number of companies in the food plot seed industry has exploded in recent years. With this came a barrage of advertising campaigns, a million “proven” seed blends to choose from, and what I refer to as “hornography” (pictures of big bucks “grown” on food plots). I relate this to the old saying “you can’t see the forest because of the trees”. I feel the overwhelming marketing campaigns have shifted hunter’s/manager’s thoughts from “how do I plant a food plot” to “which magic bean do I need to plant”. Where in fact, how you plant is much more important than what you plant. I think many new-age “food plotters” fall into the “what to plant” trap and fail to learn and understand the importance of basic farming practices. Unfortunately this lack of understanding often results in disappointment and poor quality food plots for many. Having said this, I don’t want my friends in the food plot industry to think I am giving them a black eye. They have done great things to help wildlife stewardship and conservation. Many of these companies do a great job explaining to their customers how to plant food plots, why certain crop species do better in specific soils and climates, and how to manage them once they are in the ground to get the most benefit for wildlife. It’s not the industry’s fault. There are simply so many choices available and so many advertisements that hunters and managers are overwhelmed and have become focused on what to plant versus how to plant. The goal of this article is to review the basics of planting food plots for wildlife to help hunters and managers grow the best “magic bean” they can.
Since many food plotters focus on what to plant, let’s start here. Determining what to plant in your food plots will depend on several things, such as your goals, geographic region, soil type, wet or dry site, climate, and available farming equipment. Essentially all food plot species fall into one of three categories – annual, perennial, or biennial. Most commercial food plot mixtures include a blend of annual, perennial, and biennial plant species. In many cases, these mixtures are formulated so that as one species fades, another emerges to ensure a constant supply of food to extend the life of the food plot. It is important to understand the differences in these crops if you plan to maximize your efforts and get the most out of your food plot dollars. Here are the definitions and descriptions of each:
Annuals
Forages that complete their lifecycle in one growing season. Some plant species and varieties have the ability to re-seed the following year while some do not. This means that you must replant these forages each year if you want to keep them in your food plots. Some annuals, such as crimson clover, can be encouraged to re-seed through proper management of the food plot. This may include mowing, fertilizing, and disking the following year, and will depend on the forage species you have planted. Annual plots are generally planted in the spring or fall. Examples include small grains such as winter wheat, oats, winter peas, cowpeas, soybeans, and corn. These plots/species germinate and grow rapidly. Because actively growing plants are tender, very palatable, and very nutritious, they are often highly preferred food sources for deer and turkeys and serve as excellent attractants for hunting.
Perennials
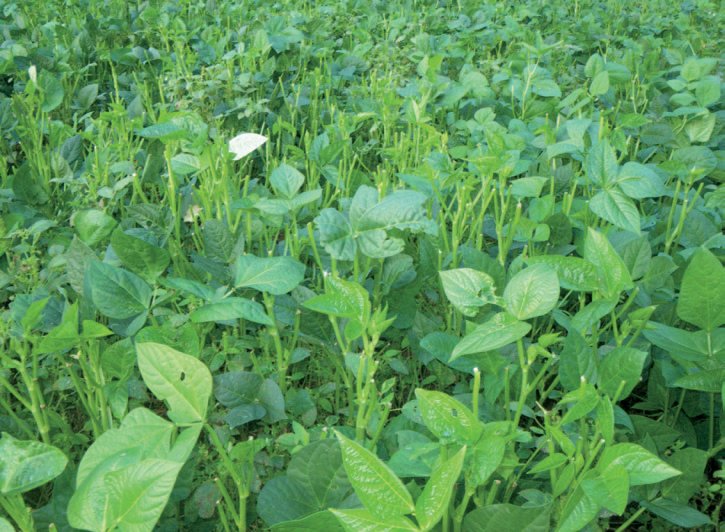
Plants that require at least 3 years to complete their growing cycle. Under suitable conditions, perennial forages have the ability to persist for more than one year. This means that you can get multiple years of forage production from a single planting. Perennials have specialized root systems that allow them to regenerate from their roots after the leaves and stems of the plant die at the end of the growing season. The number of seasons you will get from a single planting depends of the specific forage species, how well you maintain the food plot, and the region you are in. The primary purpose of perennial food plots in your program is to provide increased nutrition throughout the year.
Fall Annual Food Plot Mix

* D = drilled B = broadcasted
With management, the clovers will re-seed themselves. Wheat and oats will need to be planted each year.
Perennial Food Plot Blend (managed for year-round production)

* D = drilled B = broadcasted
Because perennial clovers and chicory often start out slow (they are developing root systems), Crimson clover is added the first fall as the nurse crop.
Because most perennial crops such as white clovers, chicory, and alfalfa are relatively slow to establish, it is important to include an annual crop species in the mixture during the initial planting to provide a quality food source until perennials establish. Because perennials grow well into or through the growing season (summer), weed control is essential to maintain a quality perennial food plot. From my experience, perennials are not quite as attractive to deer as annuals (there are always exceptions) but provide a preferred high quality food source when natural browse availability is low or when other annual food plots are not growing.
Biennials
Biennials are forages that require two growing seasons to complete their life cycle. They are most often planted in spring, grow throughout summer and fall, go dormant in winter, and begin growing again the following spring. At the end of their second summer they produce seeds and then die. This means these forages will need to be replanted every two years. Biennials are generally added to supplement annual or perennial food plots. Many red clovers are biennials.
Unfortunately, there is no single food plot species that can provide a completely balanced nutritional diet for deer throughout the year. Thus, hunters and managers must select a variety of seed types/crop species that are compatible and will grow well on their property/soils to ensure year–round, quality food is available in their food plots. One of the best ways to ensure year-round quality food plots is to design your food plot program to accommodate both annual and perennial species. Depending on the situation, I generally recommend devoting 40% of your food plots to perennial crops and 60% to fall and summer annual food plots – biennials are generally components of both.

While in some cases you will pay more for the product, many commercial seed companies have done the homework for you and reputable seed companies have seed blends that have been tested with proven results. All commercial seed is required to have a seed tag (list and composition of seeds or ingredients in the bag). Read the seed tag carefully and understand what you are buying before purchasing or planting it. Certainly do not fall into a marketing trap. I don’t want to come across to you as being skeptical of commercial seed blends. I have, do, and will use commercial seed blends in my management strategies. There are many very reliable seed companies that produce high quality blends. However, because so many companies with competing marketing strategies exist, and considering the convenience of buying these blends, I simply want to caution you to choose carefully.
While there are lots of commercial food plot mixes on the market, I have included a few of my favorite “tried and true, no-thrills” fall food plot blends that provide both attraction for hunting while providing quality nutrition for deer (and other wildlife). These are very basic blends comprised of seeds that can be purchased at most farmer’s cooperatives across the Southeast. The annual food plot mixes provided are designed to provide attraction during hunting season yet the annual clovers will persist and provide good nutrition through early summer in most areas. Again, these are not “magic beans”, nor will they do well in every situation. They are just basic blends I have found to work well in many soil types and conditions and are relatively easy to grow and manage. One of the best places to start researching “what to plant” on your property is your local state wildlife agency or a wildlife management consultant. There is also great information available from most land grant universities and cooperative extension services – much of this is easily accessed via the internet. Dr. Craig Harper recently completed a fantastic book called “A Guide to Successful Food Plots – Blending Science with Common Sense” and is based on years of food plot research. This book has become my “food plot bible” and I recommend it to anyone planting food plots. It can be downloaded or purchased from www.utextension.utk.edu/publications/wildlife. Again, you will find lots of false information out there so take it with a grain of salt and stay focused on factual information versus advertisements. As you experiment with your own blends, you will end up with your own favorite “go-to” food plot blend that works well on your property.
Preparing for Success
Before rushing off to the farmers cooperative to buy seeds to plant, be sure you are properly preparing your food plots to ensure success. Your food plots will probably fail if you simply plow ground and spread the seed. The process for successfully growing food plots is really no different than successful farming, which takes preparation. A successful food plot program is well thought out and planned ahead of time. It is difficult, if not impossible, to establish successful food plots without preparation. Planting food plots is a process that may span over several months, not a weekend. Determining what to plant, taking soil samples to determine soil conditions in each plot, applying required amounts of lime and fertilizer, preparing the seed bed well ahead of planting dates, and managing weed competition takes time. These are all vital steps for success. Poor preparation not only results in wasted time and money, but also results in poor food plots that do little in the way of providing benefit to wildlife.

A Few Key Preparations:
Soil pH
Without proper soil pH and fertility, food plot failure is inevitable. Without question, ensuring proper soil pH and fertility is more important than what you plant. Determining the current soil pH and how much lime to apply is easy and one of the cheapest, but most important things you will do. To do so, obtain soil sample bags from your local farmers cooperative, collect soil samples from your food plots, and send to a soil testing laboratory. There are several commercial soil testing labs you can use or check with the closest land grant university.
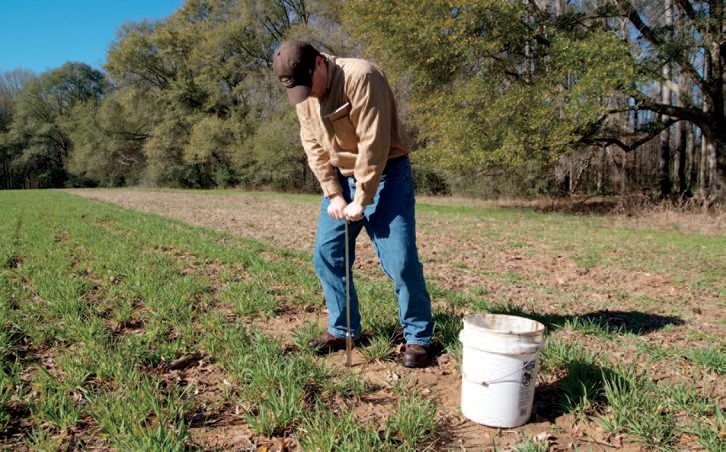
Soil pH is more important than fertilizer because proper soil pH is required to transfer nutrients (fertilizer) to food plot plants. You can spread 50 tons of fertilizer per acre on a plot, but without proper soil pH, it will be of little use to the plants and is going to remain in the soil, or be leached out by rain. To effectively change soil pH, granular lime must be applied at least one month, preferably several months, before the planting date. Lime must have time to complete the chemical process of changing the soil pH. In some cases, the full benefits of applying lime may not be realized for up to 12 months. Lime can be applied anytime of the year, even under dry spreading conditions and on unbroken land. Because lime does not move quickly downward in the soil profile, it is important to incorporate it into the top 4-6 inches of the soil where it is available in the growing zone. That is, apply lime and fertilizer and disk it in when preparing the seed bed.
Besides supplying calcium and magnesium which neutralizes soil acidity (increases soil pH), lime also promotes desirable bacterial activity in the soil, improves organic matter decomposition and increases plant’s ability to efficiently use fertilizer elements. Fertilizer without lime is about as effective as a deer rifle without bullets. In summary, to get the most out of your expensive seed and fertilizer, or even to get forages to grow at all in some cases, apply lime according to a soil test or even higher than recommended. It will contribute to higher protein levels, higher production, better digestibility and ultimately high quality food plots. Lime is calcium, a major component of deer antlers. Take home message: Ensuring soil pH is in the desired range for optimal plant growth is often overlooked or skipped, but is more important than what you plant and will result in successful, healthy food plots for wildlife on your property.
Soil Preparation
Proper soil preparation is essential for successful food plots. Seed bed preparation is more than simply breaking ground. Soil preparation is a process. The basic steps in seed bed preparation include spreading lime and fertilizer, breaking the ground, harrowing the field to eliminate grasses and weeds (herbicide is often used), and cultivating or smoothing the field (leveling). A cultipacker is an excellent tool to use for final smoothing and packing in seed. The end result should be a smooth, firm seed bed free of clods and debris and ready to plant. A smooth planting surface ensures that seed planting depth is consistent on the plot which promotes optimal germination and growth. Without a smooth surface, many seeds are covered too deep and will not germinate. Again, the process of preparing the seed bed should start well in advance of the planting date.
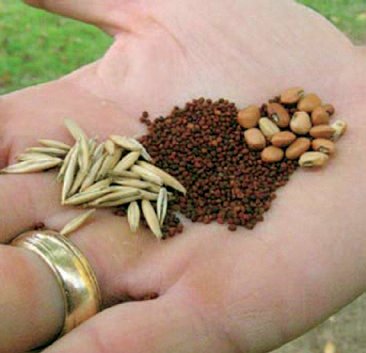
With just a little more effort and cost (minimal tractor fuel), properly preparing the soil over time is a much more cost-effective method and will certainly provide more benefit to wildlife and help you reach your goal. I have seen many unsuccessful food plots that were a result of poor seed bed preparation. While some germination will occur and provide some “huntable” food plot, the “plow and plant in the same weekend” method simply does not result in quality food plots.
Timing of Planting
Nearly all food plot seed blends come with a mini planting guide describing how and when to plant. This is important information that will help you succeed. Most fall food plot species should be planted from September through November depending on your particular growing zone and soil temperatures. However, it is up to you to determine the best time to actually plant within this range of dates. That is, just because it is September, it does not mean it is a good time to plant. Ideal planting conditions occur when the soil has adequate moisture to initiate germination of seed and forecasted rain within the next week or so after planting to feed germinated plants. One rain is not enough and be cautious about planting too early in the fall. For fall food plot success, we generally count on consistent cold fronts to deliver needed rain. In the Southeast, we generally get our first cool snap in early or mid-September. This generally gets hunters fired up and thinking about planting their food plots. If you pay attention, you will see many trucks pulling tractors on the highway headed to plant food plots after the first rain in September. Unfortunately, September is generally a dry month in the Southeast and these food plotters have been suckered into putting seed in the ground that will probably struggle until frequent fall rains begin in mid-October. Even if these plots receive adequate rainfall, the crops will be knee high and less palatable by the time gun deer season starts. We get many calls from hunters in early November that want to know if it is ok to mow their food plots because they have gotten mature and/or wonder why deer are not using them. You also run a higher risk of army worm infestation or disease if you plant too early. The key in timing your fall plantings for optimal success is to monitor the soil moisture, watch the weather, and know a little about your local annual weather patterns. It is always a guessing game. No one can predict weather with 100% certainty. There is actually an 80% chance that your local weatherman will be wrong! Ha. But if you do your homework and time your planting date to occur during good planting conditions, your chances of not only being successful, but growing great food plots increases significantly.
Most Common Mistakes Made:
- Not properly amending soil with required lime and fertilizer. This step is more important than what you plant. Of these, managing the soil pH is most important. Without proper soil pH, nutrients (fertilizer) are not available for the plants.
- Planting more seed than needed. The philosophy of “more is better” will hurt you when planting food plots. Stick with recommended rates. Too much seed will result in crowding and stunted growth, or plant mortality.
- Planting seed too deep. This is primarily caused by planting on rough fields that have not been properly smoothed and prepared or by disking too when covering seed. Seeds planted too deep will not germinate.
- Planting under unfavorable soil moisture conditions. Successful food plot farmers monitor soil conditions prior to planting dates, watch the weather and plant accordingly.
- Planting too early. Many food plot farmers get fooled into planting too early by an early cold front or rain event. Early fall is generally dry throughout most of the Southeast. Plots that are planted early either experience a mini-drought before consistent cold fronts begin bringing needed rain, or if the plots get adequate rain, food plots grow quickly and are knee-high and less attractive to deer by the time hunting season arrives (your food plots are also competing with acorns in early fall). In Alabama, I generally try to plant in late October or early November.
- Not inoculating legumes (e.g., clovers). Inoculants contain nitrogen-fixing bacteria that are needed by legumes. Legumes will germinate without an inoculant, but in most cases will not do well. Some legumes come pre-inoculated.
- Not controlling weed competition after crops are planted.
Conclusion
Planting quality food plots will attract, hold, and benefit wildlife on your property. Anyone can plow the ground, toss out seed, and grow something green. However, if you want to get the most out of your food plot dollars and efforts, and actually do something that will benefit wildlife on your property, take the time to plan, prepare, and plant quality food plots. Rather than being primarily focused on what to plant, concentrate on the basics of successful farming, which are amending the soil to ensure proper soil pH, creating a clean/smooth seed bed, monitoring soil conditions and weather forecasts, and planting a combination of food plot species that compliment each other and are well adapted to the site you are putting them. Planting quality food plots will not only benefit wildlife and help you reach your management goals, but will save you time and money in the long run.
Steps for successfully growing quality food plots:
- Obtain soil samples and test nutrient and pH composition several weeks before planting dates.
- Apply required lime to properly amend soil to desired level (most food plot plants grow best with a soil pH of 6.0 – 7.0). Apply lime at least 6 months prior to planting date if possible to allow time for soil pH level to change. Disk lime into soil. Applying lime at planting time is not ideal, but is better than not doing it at all.
- Two weeks prior to the tentative planting date – Prepare seedbed by plowing, disking, or tilling. This is often a process rather than a weekend project. Plow, then allow time for soil to settle, then plow again to create a clean seedbed. This is also when you want to apply required fertilizer. Be sure to incorporate the fertilizer into the growing zone (top 6 inches of soil) by tilling or disking. End product should be a smooth, bare-ground field. Avoid leaving deep ruts or cuts in the field which will result in “seed collectors” when you broadcast seed. Seeds landing in these deep crevices will get covered too deep and will not germinate.
- Watch the weather. Ideal planting conditions occur when soil already has good moisture with forecasted rain within a week after planting date. A good rule of thumb when testing the soil for adequate planting moisture is to grab a handful of soil and make a fist with it. If the soil compacts and stays together making a ball, soil moisture is good. If the soil does not stick together well (even in sand), it is probably too dry to plant.
- Sow large seeds first (e.g., wheat, oats, Austrian winter peas, etc).
- Lightly disk or drag the field to lightly cover the seed. Do not cover seed deeper than 1 inch.
- Firm the seedbed with a cultipacker. This step will serve 2 purposes. First it will ensure the larger seed has good seed-to-soil contact. Second it will create a very smooth, firm seedbed for the smaller clover seeds to be planted.
- Sow small seed (e.g., clovers, chicory, etc)
- Cultipack seedbed again to push small seed into seedbed ensuring good soil contact and improve germination rate. If you do not have a cultipacker, simply broadcast the small seed and do not cover. Rain will adequately cover these small seeds.