

June/July 2014
Initiate management of beaver ponds for creating and attracting waterfowl this winter
Similar to cultivated duck ponds and green tree reservoirs equipped with water control structures, beaver ponds can be managed to produce duck food to attract waterfowl and provide great hunting opportunities. If quality mast producing trees are still alive in the beaver pond, manage the pond as a green tree reservoir – meaning apply a slow draw down before spring green up. While most oak species can tolerate being flooded over dormant season, few do well and often die if their feet stay wet well into summer. If few quality trees exist or if trees are already dead (from constant flooding), you have a few options on management strategies. First, you could drain the pond early in the growing season (at spring green up or very early summer) to allow natural wetland/moist soil plants to germinate and grow throughout the summer. Many moist soil plants produce seeds which are quality duck foods. A slower draw down over several weeks will result in a more diverse species composition of plants providing a variety of seeds/food. Another option would be to hold water on the pond until mid-summer, drain the pond, then broadcast small grains such as millets. I personally like Japanese millet because it easily germinates on mud flats with little or no site preparation, grows well in wet soils, produces an abundance of seeds, and if water is properly managed it will often re-seed the following year. Planting grain in a beaver pond is relatively easy. Simply broadcast seed at the recommended seeding rate per acre onto exposed mud flats. Although fertilizing is not essential to success, it can help. I have rarely fertilized broadcasted crops in beaver ponds and have had great success without it.
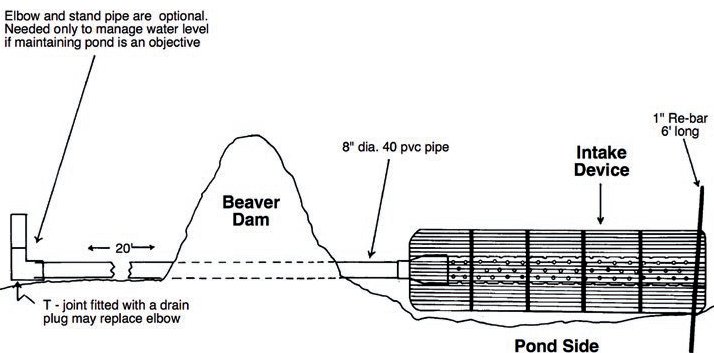
Now to the hard and messy part – water control. To consistently manage a beaver pond successfully for ducks, it is necessary to drain the pond by breaking the dam and installing a drain pipe. Generally speaking, this means a pipe that extends well into the pond with many perforations to prevent beavers from patching the leak. Although it is messy, and certainly watch out for water moccasin/cottonmouth snakes, breaking a beaver dam is often not as difficult as it seems and can normally be done with a fire rake. Break the dam on the downhill side of the existing channel in the form of a narrow, deep “V”. The initial flow of water through the dam will help clear excess dam materials. Place the drain pipe deep into the break so that at least 10′ of pipe extends into the upstream area. The final level of the pond will be determined by the height of the downstream end of the pipe, or the stand pipe position height. There are many options for beaver pond drain pipes. The key is to install a pipe that is designed to prevent beavers from “patching the hole”, yet does not drain the pond so that beavers remain in the pond. Always leave at least 1/3 to 1/2 of the pond area un-drained during drawdown, as over-draining may cause the beavers to seek new areas. There are many homemade and fabricated designs that can be found by doing a little internet research. If you do not use a drain pipe that allows you to adjust the water level, you will need to remove the drain pipe approximately 45 days after natural moist soil plants or your planted crop germinates. This will allow beavers to patch the break in the dam resulting in the pond flooding. Using this method often requires re-breaking the dam and re-installing a drain pipe higher in the dam to maintain the desired water level. I like the Clemson Pond Leveler as it is a great and relatively permanent design that allows you to control water levels by adjusting a standpipe on the downstream side of the dam.
Control feral hog populations
“Control” may be the wrong word to use here, but you get the point. Although removing hogs could be on your management calendar throughout the year, summer is a good time to put extra effort into this since it often causes a moderate disturbance on your property. Hog populations are rapidly growing in many areas and are causing significant damage to wildlife habitat, food plots, roads, etc. wherever they live. One reason it is difficult to “control” hog populations is that they are reproductive at 6-8 months old and are very prolific, having up to 3 litters of young per year! Thus, exponential population growth can and does happen if resources are adequate. The most effective way to remove hogs is through aggressive trapping. Be sure to do some research before you simply throw a few traps out. Specific trapping techniques have proven to be more effective than just baiting a trap and catching a hog or two each time. Another effective strategy, but more costly, is hiring professional hog hunters that use either night vision equipment and/or dogs to harvest hogs. Simply shooting hogs when opportunities present themselves helps, but is not an effective strategy to control them.
Improve wildlife value of habitat edges
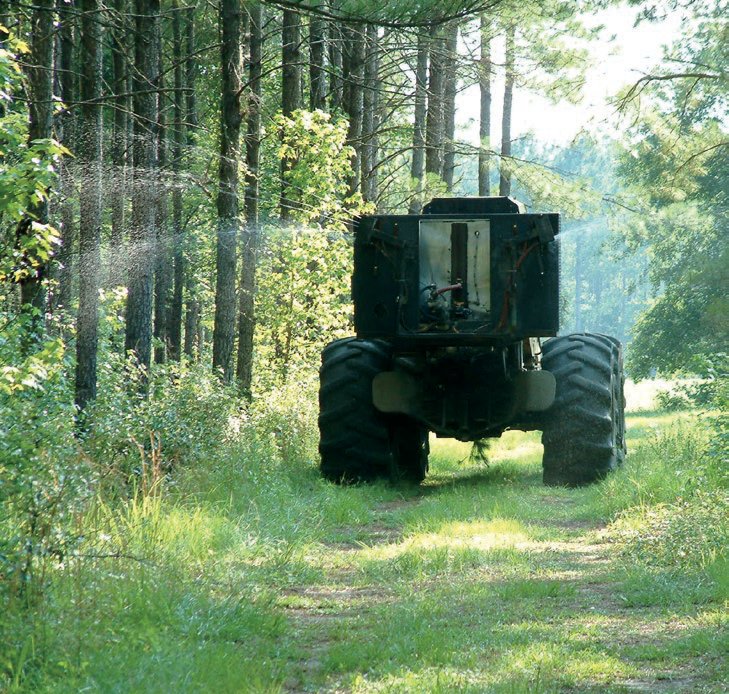
Most game species of wildlife travel, feed, and thrive along habitat edges. Habitat edges or “ecotones” occur where two habitat types merge or join. The most noticeable are edges created where woods meet fields, but edges can be as subtle as the transition of a brushy creek to a stand of young hardwoods. Improving the quality of edges and the food they provide will increase the wildlife value of your property. Although “interior” edges are more difficult to manage due to access, improving the quality of edge habitat along roadsides, food plots, and fields is relatively easy. There are many methods used to enhance edge, but applying selective herbicides generally produce the best and longest lasting results. Application of herbicide can be made with a backpack, 4 wheeler, ATV, or tractor mounted sprayer. Simply apply herbicide along the edge spraying as far into the edge as you can. The goal is to remove undesirable mid-story woody species such as young sweetgum and ash trees to encourage increased growth of plants that will benefit deer, turkey, and quail, like legumes, forbs, and blackberry species. If possible, include these areas in prescribed burns the following year to remove “skeletons” of the trees and underbrush you killed via herbicide and to stimulate additional desirable plant species. Another tip is to include managed edges when you fertilize food plots or fields. In addition to removing undesirable trees/shrubs that compete for sunlight and nutrients, fertilizing these areas can significantly increase the amount of foliage the remaining desirable plants produce.
Monitor and control weeds in summer food plots
If you planted summer food plots (which I hope you did), it is important to monitor weed encroachment to ensure you get the most benefit out of your food plots. If you are new to planting summer crops, you will soon become an expert at weed identification and herbicides. Just by the nature of warmer weather and excellent growing conditions, food plot managers have a tougher weed battle to fight during the summer. There are many summer weeds that will take advantage of the lime and fertilizer you applied to the soil for your summer food plot plants. If left unattended, these weeds can, and will, take over your summer food plot resulting in less quality forage for your wildlife. Make food-plot-specific notes of the weeds you are having problems with so that you can adjust your planting the following year. For example, if you have grass type weed problems (such as Johnson grass), plant a broadleaf crop on that plot so that you can spray grass-selective herbicide to control the problem grasses without harming your crop. Vice versa, if you have broadleaf weeds, plant grass or grain crops so that you can spray broadleaf-selective herbicides. While weeds are persistent, we are smarter!! Anticipating your site-specific weed problems and planning/planting accordingly will help you make the most of your summer food plots and efforts. It is also less frustrating when you are winning the weed war!
Road maintenance – “limb” roads through herbicide applications
Late summer is a great time to “knock back” vegetation along interior roads of your property. While you can use loppers, saws, and other tools to physically remove overgrown limbs and brush from roads, this method is labor intensive. Applying herbicide along roadsides is a great way to accomplish the same results. When choosing the herbicide method, it is important to make sure you use an herbicide that will kill the intended species you are trying to control and that it is not “soil active” meaning that it gets transported to the soil and will kill entire trees or shrubs (unless of course this is your goal). While there are several herbicides that can be used, I often use glyphosate for general “limbing” of roads and right of ways. This herbicide only kills the portion of the tree or shrub you spray. That is, it does not kill the entire tree. Parts that are sprayed generally die within a few weeks or a month after the application and limbs will drop shortly afterwards. This herbicide method generally results in a cleaner roadside because it gets sprayed on all the vegetation within the zone you are trying to control; whereas using the pruning method, only the limbs that are physically removed are taken out. One disadvantage of using the herbicide method is that its results are not as aesthetic as the pruning method. That is, expect to see dead limbs and shrubs for a couple months after they die. However, it is a more complete method. Again, it is very important to read and understand the label of any herbicide before application. Limbing roads not only removes limbs and brush that scratch your truck and equipment, but it makes traveling roads safer by increasing visibility, allows more sunlight to reach the road to reduce time needed to dry, and it results in better quality wildlife habitat along roads due to the regenerating vegetation.
Allow wildflowers to mature and go to seed before mowing
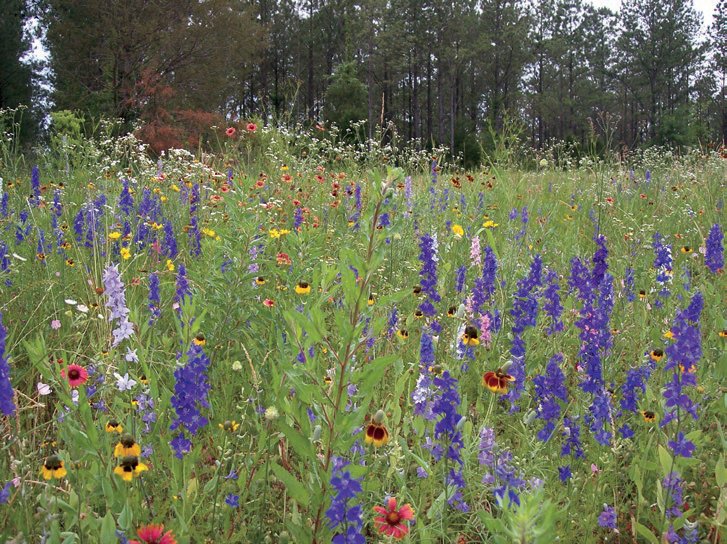
Managing wildflower areas is a great addition to your property management strategies, particularly if one of your goals is improving habitat for turkeys and quail. They not only add aesthetics which adds to your outdoor experience, but the flowers attract an abundance of bugs and insects that are eaten by turkeys and other birds. If you have planted or are managing wildflowers on your property, avoid mowing these areas until seedpods have matured. Allowing the wildflowers to produce seed before mowing will ensure adequate reseeding for a good crop the following year. If you are not currently managing wildflowers on your property, but want to do so, do your homework to determine the best wildflower blend for your particular soil and climate, begin preparing seed beds well before planting time (fall) to create a smooth firm seed bed, and plan to plant them this fall. Due to the small seed size of many wildflowers, a smooth seed bed is critical to success. Rough seed beds often result in seeds getting covered too deeply and will result in low germination rates even if broadcast by hand. Once established, and with periodic management such as mowing, wildflower areas can persist for many years.
Complete draining duck ponds and prepare for planting
If you are managing a moist soil area/duck pond, (i.e., native vegetation vs. planting agricultural crops), you should have started the spring drawdown around 45 days after the last frost. Slow drawdowns, those that take 2-3 weeks, are desired because they result in a more diverse wetland plant community than rapid drawdowns. A diverse community of wetland plants will result in many different types of food sources (seeds and insects). By May or June, your drawdown should be complete and native moist soil plants are starting to establish. Herbicides can be a useful tool to remove undesirable vegetation if it becomes a problem and is dominating the pond. Button bush and sesbania (wetland shrubs) can be beneficial, but should be kept in check and not allowed to comprise more than 25% of the pond.
If you plan to plant an agricultural crop rather than manage the native vegetation, leave the pond flooded until closer to planting time. That is, drain ponds you plan to “plow and plant” a few weeks before you start plowing and preparing the soil for planting. Leaving the pond flooded until this time will provide weed control and will reduce tractor time later. Drying time will vary depending on your soils. It is better to drain early than to wait and not be able to work the ground because it is too wet and chance running out of growing season.
Start preparing and planting dove fields
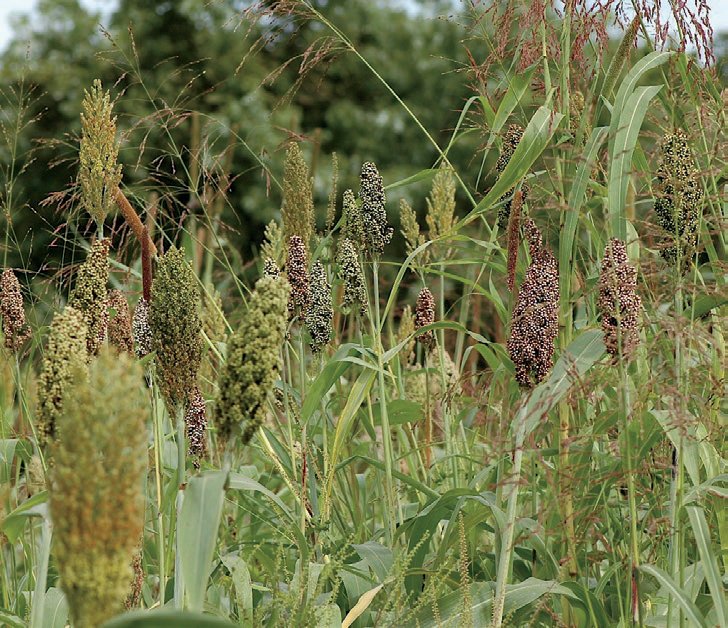
Dove field preparations should begin by June or July. Planting dates will depend on the soil moisture, crops you are planting, and the time required to produce seed. Common dove field crops include a variety of millets (e.g., dove proso, browntop, Japanese, pearl), sunflowers, grain sorghum, corn, and wheat. For best results obtain soil samples and apply required lime and fertilizer before planting. Be sure to allow enough time for your crop to produce seed before dove season arrives. While the seed of planted grains offer attractive food sources for dove, maintaining a clean disked strip or two through the field offers dusting areas for dove. These are strips that you do not plant, rather simply keep plowed through the summer and into dove season. Dove find these bare dirt areas attractive which will keep them in and around your field until grain seed is mature. It also offers landing areas and access to seed once it matures as well. Another trick that I have used many times with great success is to include/spread pea gravel (very small gravel) along roads that are within the dove field area. Dove eat the smallest particles of gravel to assist in digestion (used in their gizzard to break down seeds and other food parts). This is the reason dove are often seen “feeding” along gravel roads and other roadsides.
Learn more – Attend wildlife and land management seminars
Take advantage of seminars, field days, and other events to further your knowledge and learn how to best manage your land and enhance hunting opportunities and success. Generally speaking, there are many educational type seminars and events offered in the summer. One of the best ways to find out about these events is to contact your local extension office, state wildlife agency, wildlife federation, or a national organization geared towards your interest (e.g., National Wild Turkey Federation, Ducks Unlimited, Quality Deer Management Association, etc.). For those interested, QDMA’s 2014 National Convention will be held in late July in Athens, Ga. As a land and wildlife manager, you should be constantly learning new ways to improve wildlife and habitat, experimenting with various wildlife and land management practices on your property, and sharing your results. If you attend some of these events, don’t be surprised if you see me there. Even as a veteran wildlife and land manager I continue to seek better ways to do things, and to learn better ways to manage wildlife to achieve desired results.
