
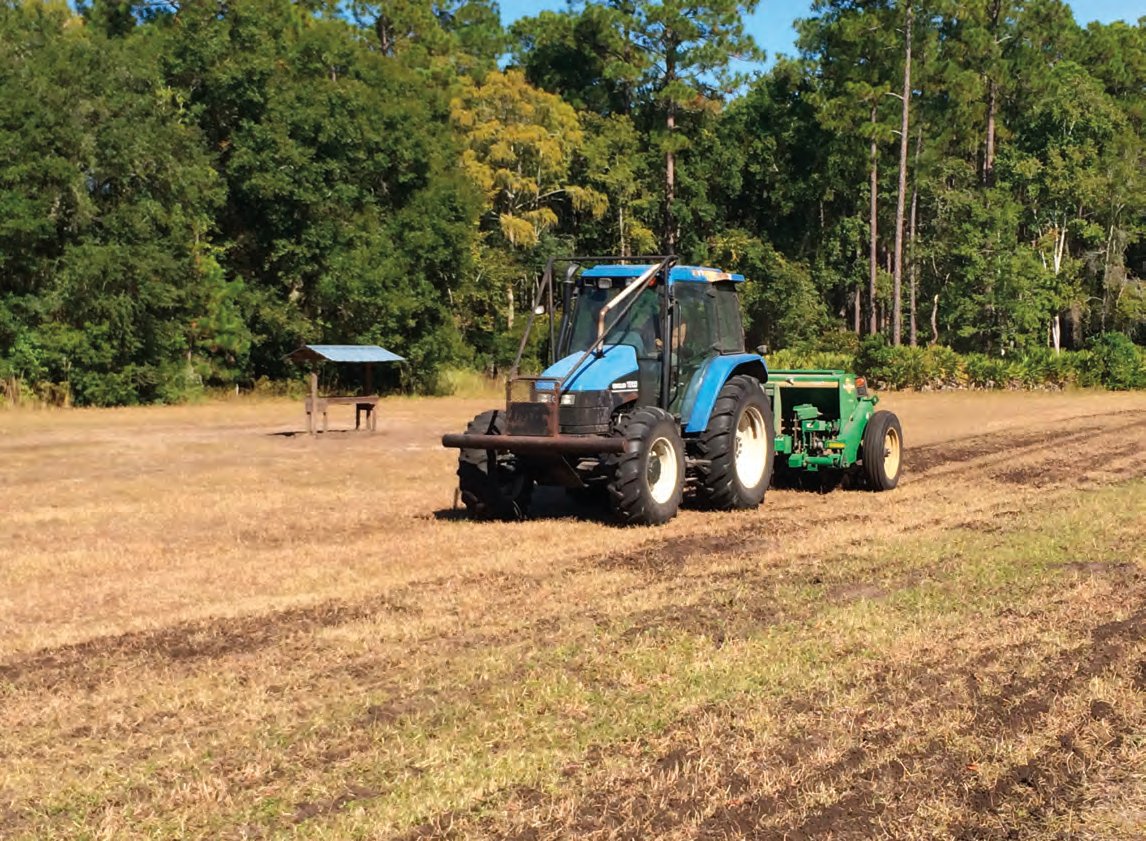
Coordinate food plot planting with good soil moisture
October through early November are often the best months to plant fall food plots in the Southeast. The goal is to plant when conditions are favorable for maximum seed germination and plant growth. Do not fall into the trap of planting too early. Unfortunately, many landowners and hunters plant in early-mid September. Some hunters, particularly hunting clubs, even pick a specific weekend that food plots will be planted well ahead of time and do not have any idea of what the soil conditions will be like….but they plant anyway because “that’s when we plant every year”. This is often a very dry period across the Southeast which could lead to food plot failure. If planted in September and you are lucky enough to receive adequate rainfall, food plots may grow rapidly which will result in over mature, (i.e., high/tall), food plots by the time hunting season arrives. If an abundance of acorns are present during this time, plots receive less browsing pressure by deer which allows the plots to grow even more. I commonly get calls from hunters in November asking why deer are not really using their food plots. The most common reason is the crops were planted two months ago and the crop/food plot plants are mature, not vigorously growing, and “hardened” up making them less palatable. There is also increased chances of army worm problems in September when temperatures are warm. In most areas of the Southeast more consistent rainfall events begin in October as cold fronts move south. Planting “later”, (meaning in October-November), will also result in young, tender food plots that are extremely attractive to deer and other wildlife during hunting season. When planted under the right conditions, (adequate soil moisture), plots germinate quickly and deer will begin using them within two weeks after planting. My point is to not feel rushed to get seed in the ground. Focus more on planting under favorable conditions. There have been several articles related to food plots and planting strategies in past issues of Wildlife Trends. Refer to these articles for more detailed information.
Build and install excluder cages on your food plots
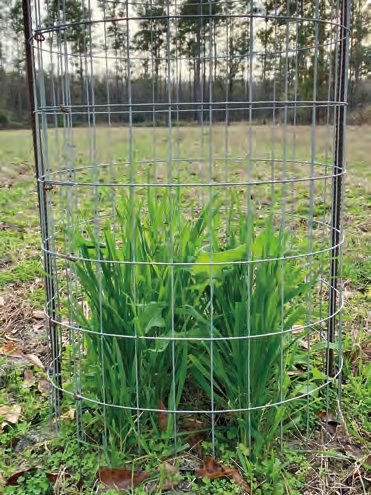
Excluder cages are simply small, fenced structures that are placed on food plots to “exclude” or prevent deer from accessing food plot crops inside the excluder cage. Doing so allows you to observe or monitor deer use of the plot and food plot success. Excluder cages do not need to be big, just enough to prevent deer from eating a small area of the food plot. In general, excluder cages are nothing more than a short length of 4 foot hog-wire fence that is “rolled” and fastened with either wire or zip-ties to create a tube with a 2-3′ diameter opening. The excluder cage can then be placed on a food plot and anchored down with a T-post or a couple pieces of rebar. Excluder cages are particularly helpful if you have a high deer density. I’ve often seen food plots in areas with a high deer density appear as though the plants never germinated. In this situation, it is common for the landowner or land manager to get frustrated thinking they planted the food plot incorrectly, or that the particular seed mix planted isn’t growing well on the property. When, deer had literally eaten the plot to the ground before it had a chance to grow, (in this case, I would consider installing more food plots or, depending on your goals, planting lead to reduce the herd!). I religiously use excluder cages because they help assess plot success and provide insight when seemingly crop failure occurs.

Consider split applications of nitrogen on food plots (not on perennial legume/clover plots)
Applying a split application of nitrogen means that you apply half of the recommended rate of nitrogen at or slightly before planting time, then apply the remaining half a month after crops have germinated and are growing. Split application reduces the exposure of nitrogen in the soil to elements that can create losses such as leaching and denitrification. The second application of nitrogen provides a boost to the growing crop when it can utilize the added fertilizer resulting in better forage production. Before deciding to apply this technique, consider normal rainfall and soils of your property. If you are in an area that receives a good bit of rainfall during early winter and your soils get muddy easily preventing you from driving on food plots with equipment needed to spread the second application of fertilizer, split applications may not be an option. Not only will applying a boost of nitrogen increase forage production, but deer and turkeys are attracted to plants that are nutritious and actively growing which will result in better hunts on your property.
Clean and service walk-in-cooler
Making sure the walk-in cooler is ready is often overlooked until the first deer is harvested; then to find out that it is not working. If you are fortunate enough to have one, servicing and preparing the walk-in cooler should be on your pre-season task list. As with any area where food is stored, the interior of a walk-in cooler should be sanitized regularly. This includes the floor, walls, racks, meat hooks, etc. A plastic 2-gallon hand-held pump up sprayer is a great tool to apply disinfectants. Drains should be inspected, cleaned, and disinfected as well. Be sure to inspect weather stripping along the door and threshold. Air leaks due to the door not sealing well can reduce the life of the compressor as it must run more often to cool the air. Performing normal preventative maintenance, such as cleaning the coils, should be done to the cooling system. Lastly, give the cooler a good test run. Turn it on and let it run a day or two to make sure all is well, and that the thermostat works.
Calibrate deer scales before hunting season
Whether the scales you use to weigh harvested deer at your hunting property are 10 years old or right out of the box, they should be calibrated each year before hunting season to ensure accurate weight data is collected. To calibrate scales, simply hang an object of known weight from the scale (e.g., 25 lbs. dumbbell, tractor weight, etc.), along with your gambrel, (normally a triangular metal hanger used to attach deer to scale), then adjust the scale to the known weight if needed. Although there are many makes/models of scales available, most have a calibration screw that can be easily adjusted. Also note that it is not uncommon for a calibrated scale to read something other than “zero” when idle. Recording accurate weights from harvested deer provides insight to the health of deer on your property and will assist in making management decisions, (herd and habitat), to achieve overall goals.
Hold a preseason meeting to discuss the progress of the deer management program and harvest strategies planned for the upcoming season
Hosting a preseason meeting to discuss the deer management program and deer harvest plans for the upcoming season will ensure everyone is on the same page before the season kicks off and hunters head to the woods. Hopefully, you have been collecting harvest, hunter, and population data regarding the deer herd. Use this information to assess the status of the deer herd and how the herd has or is responding to your management strategies. A preseason meeting is a great time to review this information, make harvest decisions for the upcoming season, and share with the group or hunters using the property. As a biologist, I often present this information to hunting clubs or landowners with recommendations for the upcoming season. These meetings are most effective if held just prior to hunting season to ensure the information is fresh on hunter’s minds. This is also a great time to review general rules for hunting, discuss housekeeping items around the camp and property, and develop management and/or maintenance project lists. I often see these meetings tied into a work day or work weekend at the property.

The pre-season period is also a good time to host a cookout for your neighbors and local wildlife officers. Not only is this a great way to meet your neighbors and/or wildlife officers, but a cookout provides opportunities to exchange ideas on deer and habitat management as well as harvest strategies. If you are trying to convince an adjacent landowner or hunting club to practice quality deer management, this is a great time to show them some of the success you have had. Pictures of harvested bucks and/or scouting camera photos are usually all it takes to convince others to join your efforts. These cookouts often result in long-term relationships between landowners, hunting clubs, and game wardens that are mutually beneficial. I have yet to meet a game warden that doesn’t like BBQ – particularly free BBQ! Making friends with your local game wardens has obvious benefits.
Mow lanes through CRP, grassy powerlines, corn fields, or fallow areas to provide additional hunting opportunities
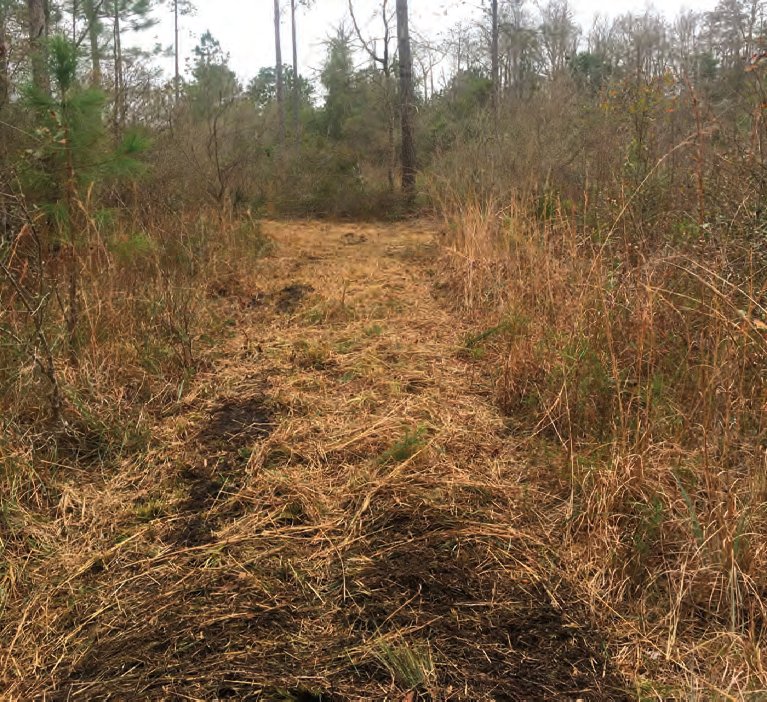
Growing mature bucks is relatively easy to do if you stick with a sound deer management program geared towards QDM. However, harvesting mature bucks is another story. Through my experience, there is no better place to observe and/or harvest mature bucks than in a long mowed lane that runs through thick cover (e.g., clearcuts, young pine stands, chest high grassy areas, corn fields, etc.). This thick cover is where mature bucks live. These lanes offer bucks a sense of security which makes them more apt to use these areas during daylight. They know that with a quick bounce, they are in heavy cover and safe. Mowed or disked lanes through thick cover also provides great travel corridors to connect woodlots or mature timber. Deer will often take the path of least resistance and will use these lanes to travel which can make for some exceptional bow hunting opportunities. Mowing a wagon wheel pattern or hub & spoke design works well if the situation allows for it. These areas make for some exciting hunting.
Implement timber stand improvements – kill undesirable tree species
Removing undesirable trees is an effective habitat management strategy to enhance wildlife and/or timber value. Killing undesirable trees is commonly used to remove non-native invasive species or to “release” desirable tree species like oaks, (often referred to as timber stand improvement or TSI). Removing undesirable trees reduces competition for resources such as sunlight, nutrients, and water resulting in better health and growth of remaining desirable trees. In some cases, removing undesirable trees stimulates natural understory vegetation growth providing quality food and cover for wildlife. One of the simplest and most effective techniques for removing select trees without cutting them down is called the “hack-and-squirt” method. Implementing the hack-and-squirt method is as simple as it sounds. Simply hack small cuts in the trunk of target trees and squirt an herbicide solution into the cut. One advantage of this method is that you can target trees you want to remove and leave those you want to promote or encourage. Using a sharp machete, brush axe or hatchet, chop into the trunk being sure to penetrate the cambium layer below the bark. With the blade still in the cut, twist the blade downward to open the cut and spray herbicide into the cut. The cut should form a “cup” that will hold the herbicide. If the cut is too shallow, herbicide will leak out reducing the effectiveness of the application. A common plastic utility spray bottle works well and generally delivers one milliliter of herbicide mixture per trigger pull. The number of cuts made in the tree will vary depending on the herbicide used and size of the tree. Although there are several effective herbicides available, I normally use Arsenol AC, (imazapyr), because it controls a wide range of species. Arsenal AC’s label recommends one cut per 3 to 4 inches of tree diameter at breast height (DBH). The mixing rate for Arsenal AC is 10 percent, or one part herbicide to nine parts water. Regardless of which herbicide you choose, always read the label for appropriate dosages, cut spacing, and mixing instructions. For example, Arsenol is soil active which means you would not want to apply it if there is a desirable oak tree adjacent to the tree you are treating. Also be sure to wear appropriate clothing and protective equipment as recommended by the label. It may be worth noting that the “hack & squirt” method is effective almost any season except early spring when trees are experiencing heavy sap flow/sap rise. However, I typically schedule hack & squirt treatments during late summer and before leave drop of fall.
Use the time lapse feature of trail cameras to scout food plots
Using time lapse may be the most overlooked feature of modern trail cameras. If you have not used it before, it essentially triggers the camera to take photos at set intervals. For example, you may set the time lapse to trigger the camera every 30 seconds during a specified time period. That is, photos are triggered by a time interval verses animal movement across the infrared sensor. This feature has opened up a whole new way to effectively scout fields, food plots or other openings. In the not-so-distant past, the only way to scout these areas was physically watching these areas either from a hunting stand or another vantage point. This not only took time, but was done at the risk of alerting deer or turkeys and adding “hunting pressure”.
However, using trail cameras set to operate on time lapse feature only requires two quick visits to the area (ideally during mid-day to reduce chances of disturbing deer or turkeys) – one to set the camera up, and after a period of time, one to pull the SD card. Installing a trail camera to monitor a field or food plot requires a different set up than the standard set used to monitor trails, scrapes, or bait. For best results, I have found that installing cameras 10-12 feet high and slightly angled down towards the field works well. Although you could use a small ladder (which is the safest method), I normally pull the ATV, tractor, or cart, (whatever I’m driving), up to the tree then stand on top of it to install the camera. Depending on the make of the camera, there are many “delay”/or interval options for the time lapse. Obviously, shorter delays will result in more photos but will consume batteries quicker. I have found that setting the time lapse to operate the first couple of hours after daylight and the last couple before sunset at intervals of 1 to 2 minutes work well. At this setting, you will get enough photos to identify where and when deer enter the field over a week or so. Although the time lapse feature is great to determine when and where deer enter and use a field, it is generally not good for identifying details of a particular animal unless they are relatively close to the camera. If I see a specific animal I am interested in, (like a buck that is a potential “shooter”), I use the time lapse to identify where he is entering the field, then find the trail and install a trail camera in the normal fashion.