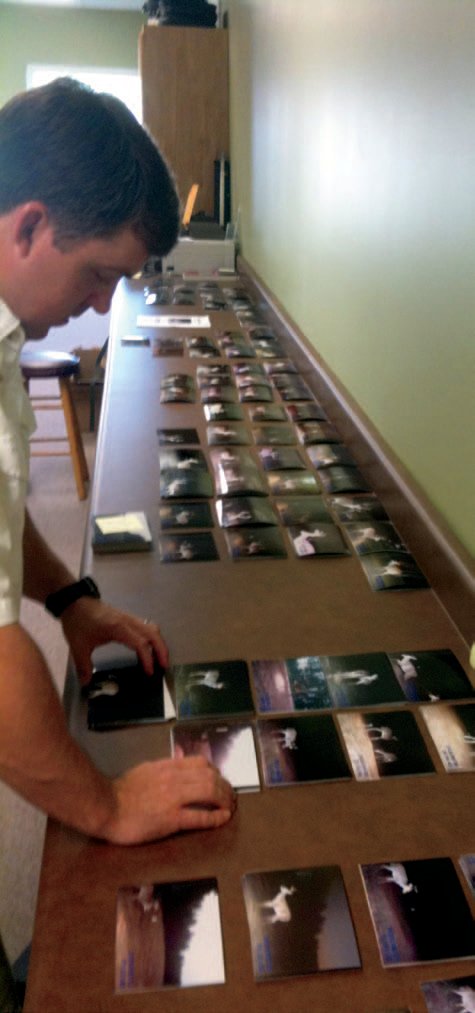

August and September are often busy months on recreational properties. As the growing season is coming to an end, many other management activities are on tap in preparation for fall plantings and hunting season. For those that enjoy “tractor therapy”, fall is your time of year as many of the calendar activities over the next couple months will require some seat time. As you are planning and implementing late summer/ fall management projects, I encourage you to include those who will be enjoying your property with you later in the fall, particularly kids and friends. Being a part of the management is a great learning experience for most and it heightens the enjoyment of hunts if they have helped manage the land, plant the food plot, or place the deer stand.
Service tractors, ATV’s, and other mechanical tools.
Because early fall is a busy period for equipment use such as tractors, ATV’s, and chainsaws, now is a great time to perform maintenance or service. I recommend developing a maintenance sheet that includes all your equipment and keeping records of service. This will ensure that equipment is taken care of and will be in good working order for the fall activities such as food plot planting and preparing your property for hunting season. Don’t forget about tractor implements such as grain drills, mowers, or harrows. We even keep a maintenance sheet for small tools like weedeaters and pressure washers.
Manage dove fields in preparation for the upcoming season.
Common dove field crops include dove proso millet, browntop millet, Japanese millet, sunflowers, grain sorghum, corn, and wheat. Dove field planting activities should be done a few months before dove season, but will depend on the time it takes for the specific crop you plant to mature. It is important to know how long it will take for the crop you plant to mature and produce seed. The goal is to have mature seed available for dove a few weeks before the season starts to allow them time to find and begin using the field. Besides providing a crop with abundant seed for dove, below are a few things I have learned that improve dove use of fields and/or improve hunting experiences.
Maintain a clean disked strip or two through the field of bare ground. These are strips that you do not plant, rather simply keep plowed through the summer and into dove season. Dove find these bare dirt areas attractive because it is easy to walk in, exposes seeds, grit, and offers dusting areas. Disked strips offer access to seed from your plantings once they mature as well.
If you do not already have “pea gravel” (very small grit stone) along roads that either run through or around the field, add it. Dove are attracted to this gravel because they need grit in their gizzard to assist in digestion of seeds and other food sources. If you pay attention to where you see dove on the way to work, you will notice they are often along roadsides that have exposed dirt/ grit, dirt/gravel parking lots or plowed fields. If you’re not paying too much attention, however, you are seeing them on power lines that overlook these places. I learned this trick of enhancing dove fields with pea gravel by accident. I had a client that wanted a boat landing on a lake that was adjacent to his dove field. We used pea gravel to make the landing. Because we had extra gravel, we spread it along a road that went through the field. When I drove through the field a couple weeks later, hundreds of dove flew up from the road. There were so many that I got out of my truck to check for cracked corn! No corn. They were simply using the grit in the gravel. Since then I have incorporated pea gravel in dove field management if there is not already a source in or around the field with great success. They are simply attracted to it. Pea gravel is relatively cheap – give it a try.
Once the crop is mature begin periodic strip mowing or sectional burning to allow access and expose seed to dove. I prefer burning if it is possible because it completely cleans the ground allowing better access for dove and exposes more seed. Only a few strips need to be added at any one time. The goal is to only mow/expose enough seed for dove to use for a week or so. Add another strip or burn another section as dove need it. This method will prolong the life of your dove field by providing seed to dove over several weeks or months.
Regardless of your management efforts, dove can be unpredictable and be here today and there tomorrow which can be quite frustrating. Dove fields are kind of like boats….it’s nice to have a friend with a dove field! However, providing a very attractive field with everything a dove needs will increase your chances of holding more dove and having better shoots.

Begin flooding duck ponds in early September.
Teal are usually the first ducks coming down the flyways as they migrate south for winter. Although it depends on where your property is located, you should expect to start seeing teal in late August through mid-September. To accommodate these waterfowl and/or to attract them for the early teal hunting season, flood at least 30% of your duck pond. To be most attractive, make sure there are some open water areas within the flooded area. The main reason for not flooding the entire duck pond is to delay seed deterioration caused by flooding. Seed deterioration rates, or the amount of time it takes for a seed to break down after being flooded, vary among different plant species. Most native wetland plant seeds are well adapted to flooded conditions and will last up to 3 months under water. However, most agriculture crop seeds break down much quicker. Thus, you only want to flood enough of your pond to provide early arriving teal with a food resource. Begin flooding the remainder of the pond in late October for the main flight of ducks. This will ensure the seeds you’ve worked hard to produce will remain longer into the winter to provide food and attract ducks. If you have never shot early season teal, you’re missing out. Teal respond to calling and work decoys well and they fly in fast, tight flocks which makes for some fast and furious shooting – notice I said shooting and not killing!! – they are tough to hit!
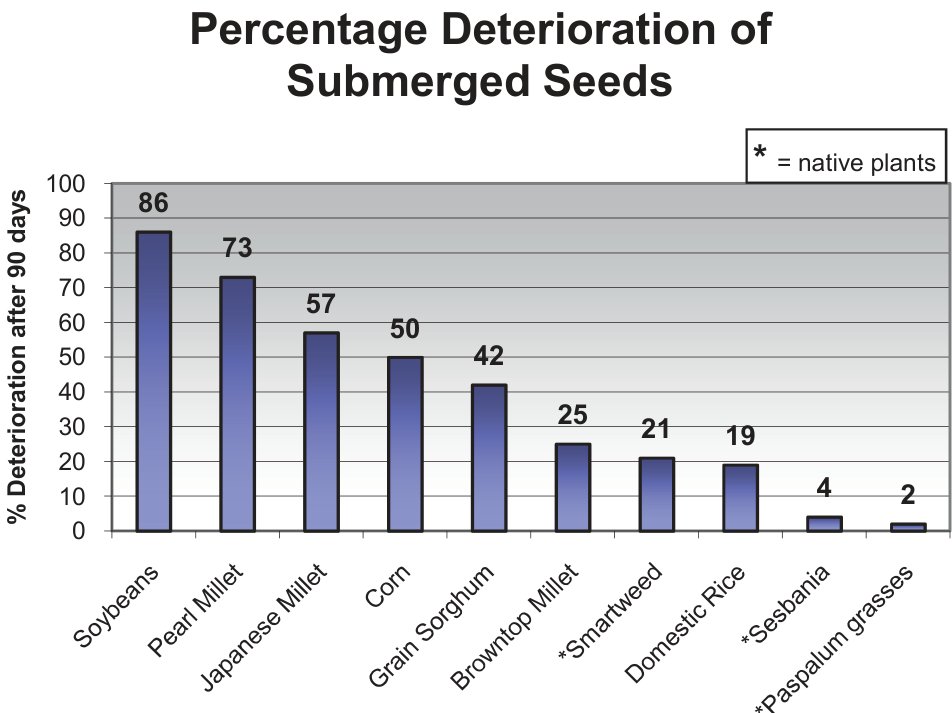
(% Deterioration after 90 days)
Start preparations for fall food plots.
It is difficult, if not impossible, to establish successful food plots without preparation. Planting quality food plots is a process that may span over several months, not a weekend. There are several factors that influence the success of a food plot program. Among the most important are establishing a well thought out food plot plan, ensuring proper soil fertility and pH, preparing a firm, smooth seed bed, only planting under favorable conditions, and controlling weeds. Each of these activities plays an important role in the success of your food plots. Here are a few tips on planting this fall:
- Test soil early and apply required lime (preferably at least 6 months prior to planting). It takes time for the chemical process to take place and effectively change the soil pH. If you didn’t lime in spring or early summer, go ahead and apply it now…better late than never.
- Use the results of the soil test to create the best fertilizer blend for your specific soil needs. Many people use balanced fertilizers such as 13-13-13 because they are easy. However, it is well worth your time to custom blend fertilizer to match your needs verses applying a balanced fertilizer that often requires applying extremely high amounts of some nutrients to compensate for the lack of others in the soil – which results in wasted fertilizer/ wasted money.
- Order seed and fertilizer as early as possible to ensure it is ready when you are.
- Ensure plots are relatively smooth. This takes time and should be done well ahead of planting dates. If you are broadcast planting, simply drag the field just before planting to provide good seed-soil contact. A cultipacker is very useful for this as well.
- Have your seed beds ready, but don’t fall into the trap of planting too early. September is often a very dry month. Mid-October is ideal in most areas of the southeast. This is when we start getting regular cold fronts that bring rain. Planting too early normally results in disease (mostly army worms), poor planting success due to droughty conditions, or if you receive adequate rain the food plot is knee high and less attractive to deer by the time gun season arrives.
- Adding annual reseeding clovers such as crimson or arrowleaf into your fall plantings will increase the quality, nutritional value, and longevity of your food plots. With proper management, these clovers will regenerate again next fall which will save you money on seed costs.
- Use exclusion cages to monitor deer use and plot performance. An exclusion cage is a small “tube” of fence staked to the plot that is used to keep deer from eating the crop in a very small area. Cages are normally 2-3′ foot in diameter and 3-4′ tall. This prevents deer from eating the crop within the exclusion cage which allows you to assess plot growth and deer use of the plot. I’ve seen many food plots where the manager thought the crop did not do well, where in fact it did but deer simply mowed it down and never gave it a chance to grow.
Prepare areas to plant wildflowers.
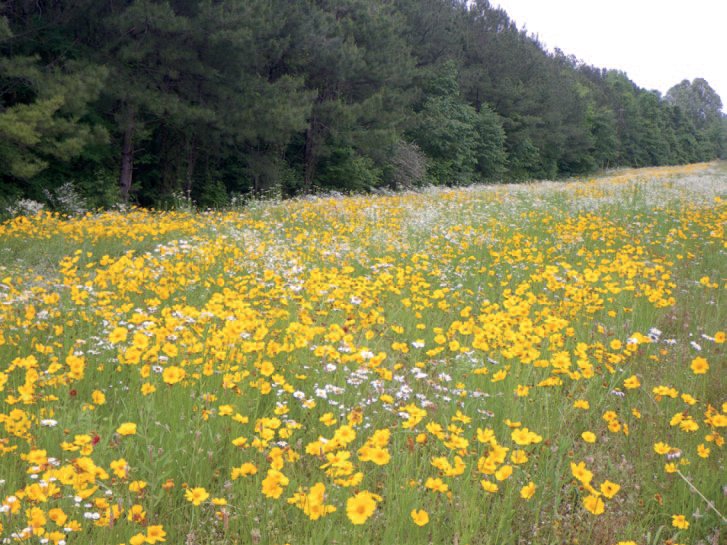
Those that have read many of my management calendars know that I like planting wildflowers. There are many reasons I am a fan of wildflowers. Establishing wildflower areas not only enhance the aesthetics of a property, but provide excellent foraging areas for turkeys and quail. The wildflowers attract a multitude of insects which are high in protein. Insects are the primary food source for turkey and quail chicks which require a high protein diet. Adults consume many insects as well. The best time to establish a wildflower area is in the fall. I recommend a mix that is suited for your area that includes annuals and perennials. If properly managed, wildflower areas are easily maintained for several years. If you are creating a new wildflower area, prepare the ground just as if you were planting a food plot. That is, create a smooth, firm, clean seedbed. Refer to the planting instructions for the mix you plan to use. Most blends recommend planting well into fall after temperatures have dropped some to prevent germination of the perennials until spring. If you already have wildflower areas, you probably have a few flowers that will persist through late summer, but most have faded. Assess the wildflower areas. If bad weed problems exist (over 50% of the area is covered with weeds), mow the area then apply a broadleaf selective herbicide a couple weeks later once the weeds are actively growing again. However, if possible (if the weeds are not overwhelming), allow the area to sit until early to mid September. Holding off and applying this management strategy in September will provide more protection for fall wildflowers that will be germinating soon. Mowing the area will scatter seed and stimulate germination.
Host a BBQ dinner for your neighbors.
Whether you already know your neighbors or not, inviting them to a cookout at your property will not only be a good gesture, but will likely result in new or better relationships that will benefit wildlife on your property. Late summer or early fall is a great time to host this because hunting season is right around the corner and on people’s minds. These are great events to exchange ideas, share management experiences, (what has worked and what has not), discuss any problems such as poaching or trespassing issues, or simply getting to know each other better. In most cases, successful deer management, particularly on small properties, requires working with adjacent landowners or hunters to ensure similar herd management strategies are being applied. When several properties are working together towards common goals it is often referred to as a “deer management cooperative”. Obviously the goal is to get as many landowners and hunters to participate as possible so that you have “control of the deer herd” over a larger area. Given the relatively large home range sizes of white-tailed deer, the more land under management the better, and any increase in acreage will improve management success. Other non-biological benefits of getting to know your neighbors may include sharing resources such as tractors, planting efforts, or other equipment. Many neighbors save money by ordering bulk fertilizer, seed, and supplemental feed. I’ve known of several great friendships that have developed through “neighborhood” cookouts.
Check and oil gates & locks
Servicing gates and locks are often overlooked, but is something that needs to be done at least annually. Unattended or poorly working gates can pose unnecessary safety hazards. The first order of business when servicing a gate, particularly one that is not used often, is to inspect for and eradicate wasps and their nests. Nothing can put a damper on a day in the woods like getting stung by a wasp at the gate! Next ensure the gate functions properly. Is it easily opened and swings level? Are the hinges in good working order? Make notes of parts needed to make repairs if you do not have them handy. To reduce the chances of running into a “no-shoulders” (snake), ensure the gate is free of tall weeds and vines by weedeating or using herbicide (recommended). Lastly, inspect and oil the lock, locking mechanism, and hinges of the gate.
Check, repair and place new hunting stands
While the best time of year to relocate or place new deer stands on your property is in late winter after the deer season has ended or very early spring (before green up), late summer or early fall is when you need to revisit these stands to tighten them back up, inspect for loose nuts/bolts, rotten or loose wood, or any other safety hazards. This is also a good time to check the shooting rails, padding, and trim shooting lanes where needed in preparation for hunting season. However, do not over do the shooting lanes. Small openings are all that is normally needed to identify and shoot deer. Because we have so many deer stands on the property I hunt, we have started using flagging as a way of ensuring each stand is safe. That is, once a stand is checked, tightened, etc, we simply tie a piece of colored flagging on the base of the stand or the ladder. We use a different color each year. For example, this year we are using orange flagging. So if you get to a stand this fall that does not have a piece of blue flagging on it, you know that it has not been through “final inspection” this year and to use caution if you use it.

Mow under and around fruit trees and orchards.
Mowing around fruit trees will not only enhance the growth of the trees by reducing competition for resources by surrounding plants, but will enhance the aesthetics of your property. Mowing will also help “clean” the understory around the fruit trees so wildlife can find the fruit as it drops in the fall (acorns, persimmons, apples, etc). As fruit or nuts begin to fall, these areas provide great places to hang a trail camera to get pictures of wildlife using the trees.
Limb roads
Because the growing season is essentially over, late summer or early fall is a great time to trim over-hanging limbs from your property’s interior roadways. Interior or secondary roads can become a jungle in just one growing season if not maintained. Have you ever ripped the exhaust pipe off your tractor with an over hanging limb, or had a limb slap you across the face while driving a golf cart down an overgrown road? Trimming limbs will help prevent equipment damage and/or personal injuries while using these roads. Removing these limbs will help these roads dry out quicker by allowing sunlight and wind exposure on the road and in some cases will enhance natural wildlife foods along the roadsides due to the added sunlight.
Develop a pre-season deer harvest plan that will maintain or improve your deer management program.
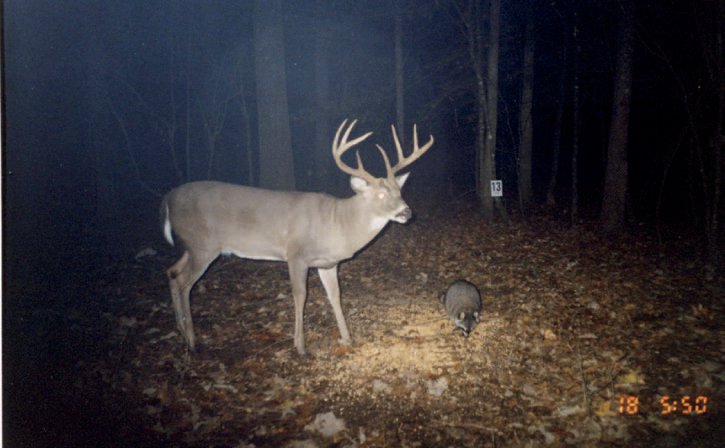
Monitoring the status of your deer herd is the backbone to the success of your deer program. Hopefully, you have been collecting harvest data (weights, measurements, ages, etc), hunter observation data, as well as conducting camera surveys. Collectively, this information is used to make sound deer management decisions that will help you achieve the goals of your program. If you haven’t already done so, ask a wildlife biologist to review your data or information and provide harvest recommendations before hunting season starts. Using trail cameras is a great way to assess buck quality and make buck harvest decisions before you head to the woods. Pictures from trail cameras will help reduce “mistakes” when judging bucks in the woods while hunting, (where judgments are often made in seconds while your heart is racing 200 beats per minute). While trail cameras are useful, a true camera survey is the most accurate method available to assess the status of your deer herd. September and October are normally the best months to conduct a camera survey (after bucks shed velvet but before the majority of acorns start to drop). If you plan to conduct a survey this fall, be sure to plan ahead. If you are doing it yourself, begin gathering all the equipment and supplies needed (cameras, batteries, digital cards, film, corn, etc). If you plan to hire a professional, get on their schedule early. With the popularity of camera surveys, most wildlife consulting companies are booked well in advance of camera survey season (September – November).